How to Create KDP Interiors on Canva For Free!
Last updated on October 9th, 2025 at 03:40 pm
Hi, welcome to my page. I’m Subha and in this blog post I will show you how to create KDP interiors on Canva.
I have been using Canva for the last 7 years or so. It’s an amazing drag and drop software with a ton of graphics, icons, shapes and text built into it.
The good thing is Canva has a very quick learning curve, you can learn it fast and start creating your very first kdp interiors the same day.
With that said, now let create some KDP interiors in Canva…
Create KDP Interiors On Canva Step By Step
🎁 Download 15 FREE KDP Interior Templates
Save time and create beautiful low-content books faster with these 15 ready-to-use KDP interiors — completely free! Perfect for journals, planners, and activity books.
Below I will show you how to quickly create kdp interiors using Canva for free.
You don’t have to purchase a paid subscription for that neither do I.
With that said, let’s just dive in…
Step 1- Deciding on The KDP Trim Size
This is the very step you need to follow to create a free book interior using Canva.
Choosing a trim size depends on the type of book you want to create.
If you are going to create a journal or planner you can go with the standard 6×9 inch trim size.
On the other hand, if you are aiming for a children’s book like a coloring book, story book or activity book then you should select a larger trim size like 8.5×11 inch.
Below some of the most popular trim sizes that KDP supports;
Paperback: Small Trim Size
- 5″ x 8″ (12.7 x 20.32 cm)
- 5.06″ x 7.81″ (12.85 x 19.84 cm)
- 5.25″ x 8″ (13.34 x 20.32 cm)
- 5.5″ x 8.5″ (13.97 x 21.59 cm)
- 6″ x 9″ (15.24 x 22.86 cm)
Paperback Large Trim Sizes
- 6.14″ x 9.21″ (15.6 x 23.39 cm)
- 6.69″ x 9.61″ (16.99 x 24.41 cm)
- 7″ x 10″ x (17.78 x 25.4 cm)
- 7.44″ x 9.69″ (18.9 x 24.61 cm)
- 7.5″ x 9.25″ (19.05 x 23.5 cm)
- 8″ x 10″ (20.32 x 25.4 cm)
- 8.25″ x 6″ (20.96 x 15.24 cm)
- 8.25″ x 8.25″ (20.96 x 20.96 cm)
- 8.5″ x 8.5″ (21.59 x 21.59 cm)
- 8.5″ x 11″ (21.59 x 27.94 cm)
- 8.27″ x 11.69″ (21 x 29.7 cm)
Hardcover Small Trim Size
- 5.5″ x 8.5″ (13.97 x 21.59 cm)
- 6″ x 9″ (15.24 x 22.86 cm)
Hardcover Large Trim Sizes
- 6.14″ x 9.21″ (15.6 x 23.39 cm)
- 7″ x 10″ (17.78 x 25.4 cm)
- 8.25″ x 11″ (20.96 x 27.94 cm)
For the sake of this tutorial, I am choosing an 8.5″ x 11″ as my trim size.
👉 Need KDP Interiors? Download 10 Free KDP Interiors: https://bit.ly/3TEDBZm
Step 2: Creating a New Document in Canva
To create a new document in Canva, head on to Canva.com create a free account.
Once logged in click on the Create a design button from the top right corner.
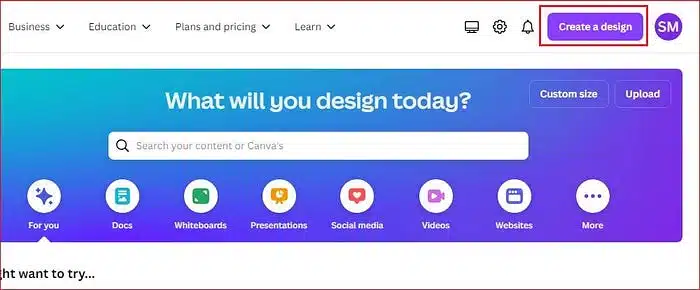
From the popup window, click on the Custom size, as show below;

On the next popup window, change the Units to in (inches) by defaults it’s set to px (pixels). Then enter your kdp interior’s width and height.

Finally click on the Create a new design button, this will create a blank document of your select size in the new tab.

Step 3: Adding Margins
Margins are very important when it comes to creating and publishing books on Amazon KDP.
Though KDP asks you to add a different inside and outside margins, for the sake of ease you can set a 0.5 inch margin all around.
There are many ways to add margins in Canva, I found a very simple one for you.
First you need to drag a rectangular shape from the Elements tab.
You can either use the search bar under Elements tab, or scroll a bit down to see the shapes section as shown below;
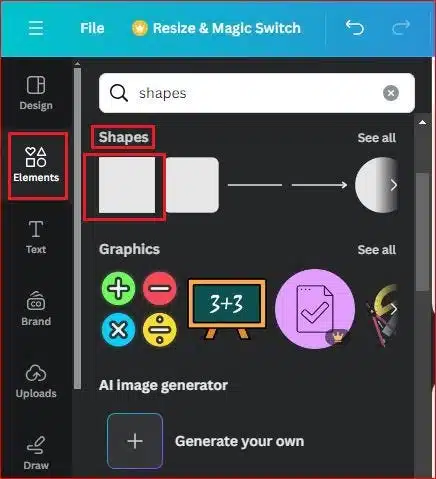
Next click on the first shape (rectangle), now you have a little rectangle on your canvas.

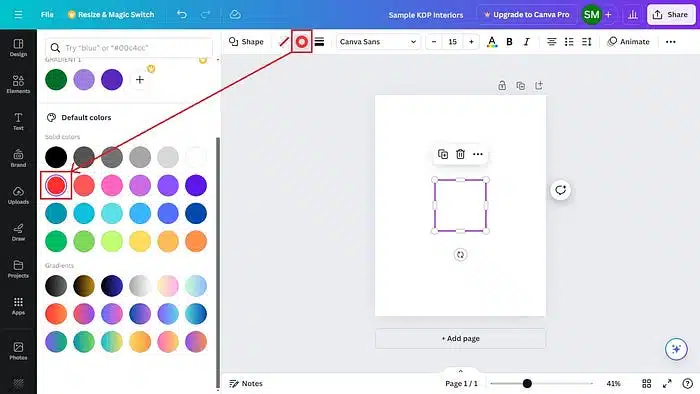
If you click on the rectangle, you will see a shapes menu on the top. This allows you to change the color and border of the shape.
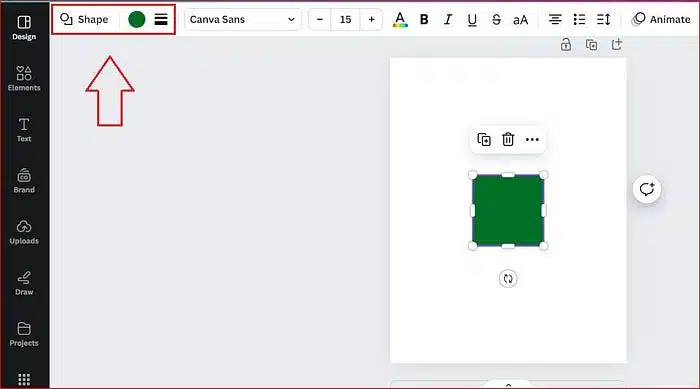
From the shapes menu click on Color Circle and set the shape color to No Color. This will make the shape transparent.

Next click on the Border Style option from the shapes menu, set the border to line and Border weight to 4. Have a look at the screenshot below;
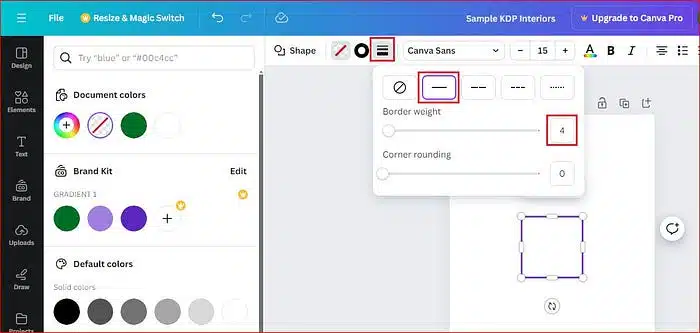
As you set the shape margin, you can see a Border color button next to the border style button. Click on it and set the border color to red.
Finally, click on the rectangle shape again, and from the top menu click on the three dots.
This will show a drop down menu, here click on the Position button.
Now you can see a big Arrange option on the left side. This allows you to align the shape on the page and change its width and height.

From the position tab, set the rectangle width to 7.5 inch and the height to 10 inches. This will create a 0.5 inch margin all around (left, right, top, bottom).
Also, make sure the rectangle is both horizontally and vertically aligned on the page.

You have a 0.5 inch margin on your canvas to create a KDP book interior.
I know it seems like a lot of work but trust me it’s not that difficult once you practice it a couple of times.
Related Post: How I Made $990 Selling 6 Medium Content Books On KDP!
Start Designing Your KDP Interior
Now comes the exciting part. Below I will be creating some of the most popular KDP Interiors by using text, shapes, and elements.
1. Create a Sketch Book
Sketch book is one of the easiest KDP book interiors that you can create on Canva. For that all you need is to drag a rectangular shape onto the canvas.
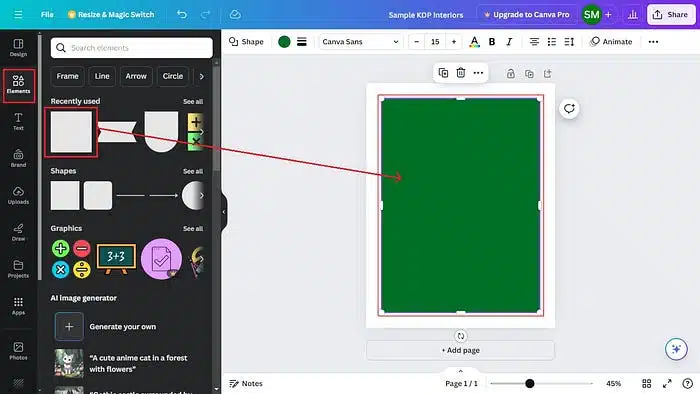
Go to Elements, shapes and click on the rectangle shape to add it to your blank document.
Enlarge the shape by using the handles keeping it just shorter than the margins. Look at the screenshot below;
Next click on the shape, change the shape fill color to No Color and the set shape border as lined.
Then change the shape border color to black. You can do these steps by using the shapes menu.
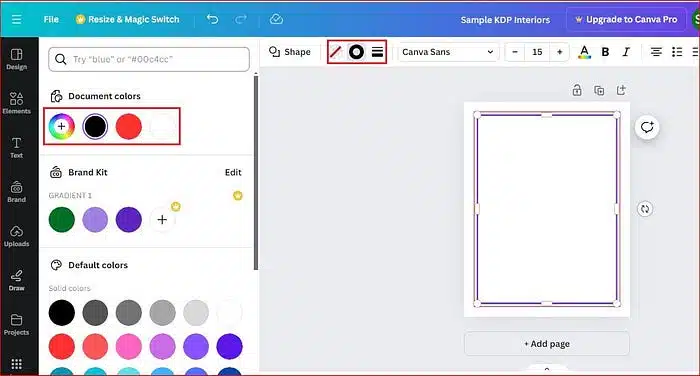
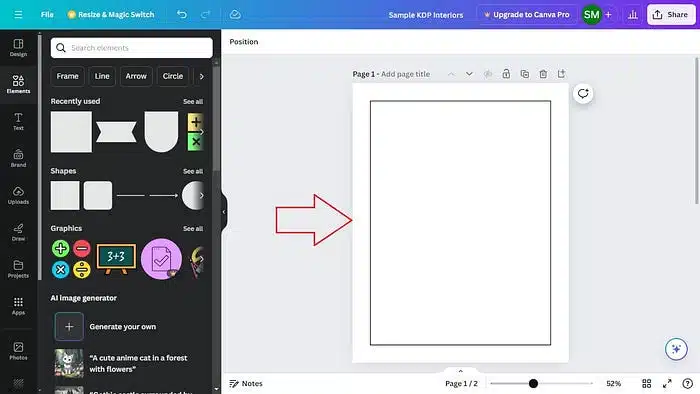
Next, click on the shape, adjust the border thickness and then delete the red margins. This will leave with you a simple sketchbook page.
Finally you can duplicate this page 99 times to create a 100-page sketchbook interior.
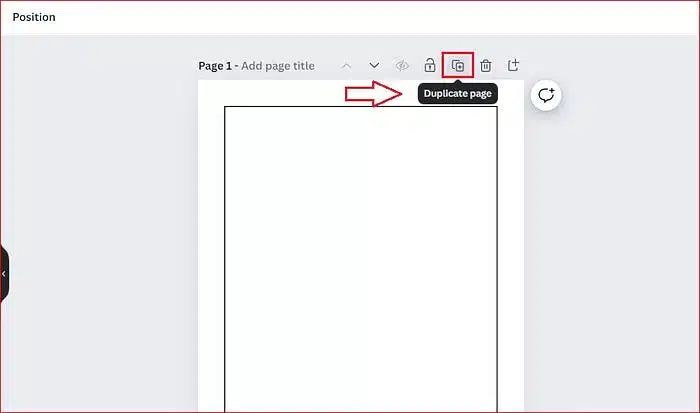
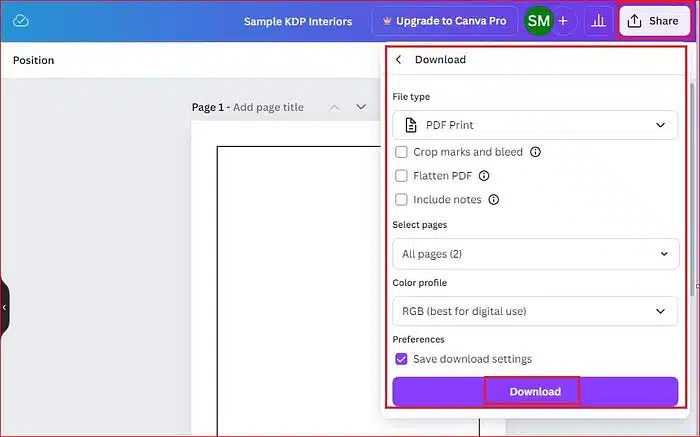
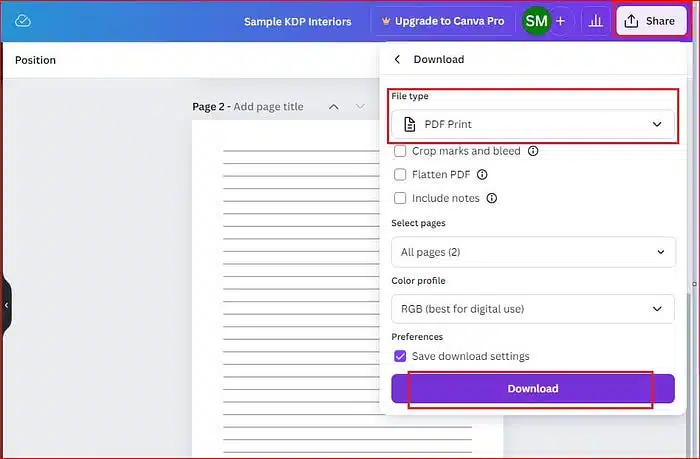
Once you are satisfied with the look and feel of your sketchbook interior, go to the Share button from top-right, then click on Download.
Change the file type to PDF Print and click the download button again.
Next, I will show you how to create a simple lined journal in Canva.
2. Create a Lined Journal
Creating a lined journal in Canva is super-easy. For the sake of demonstration, I will stick with the trim size (8.5 x 11 inches).
With your margin in place, you can press L from the keyboard to add a line on the page.
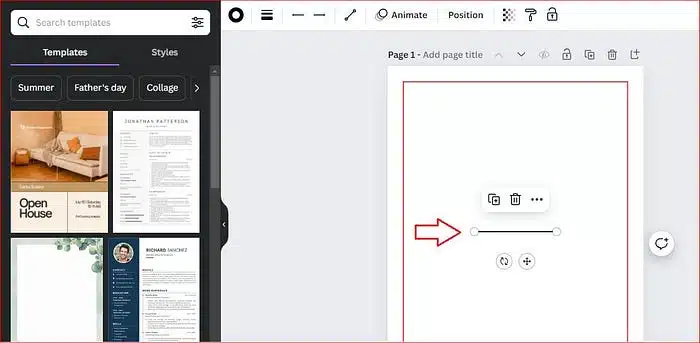
Next increase the length of the line by using the adjusting handles. Place the line to the top of the page as shown below.
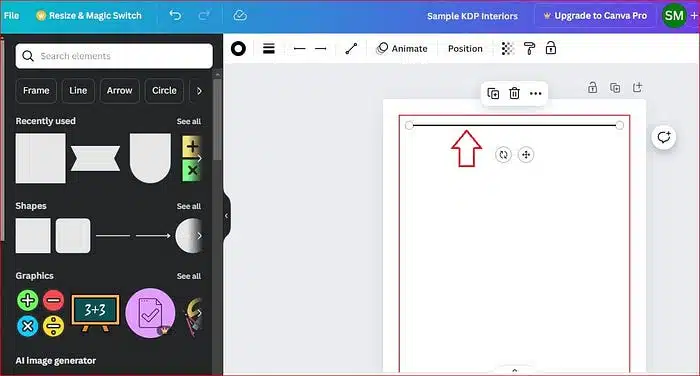
Next you can adjust the thickness on the line.
To do that select the line and from the top menu click on the Line style option and set the Line weight to 1.
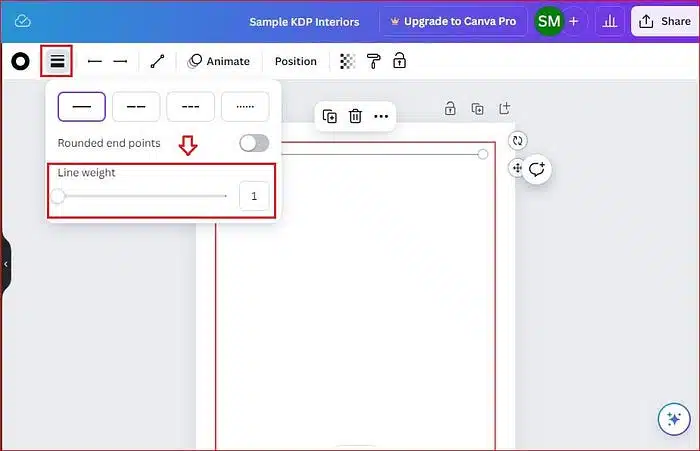
Now select the line and press Ctrl+D from your keyboard to duplicate the line.
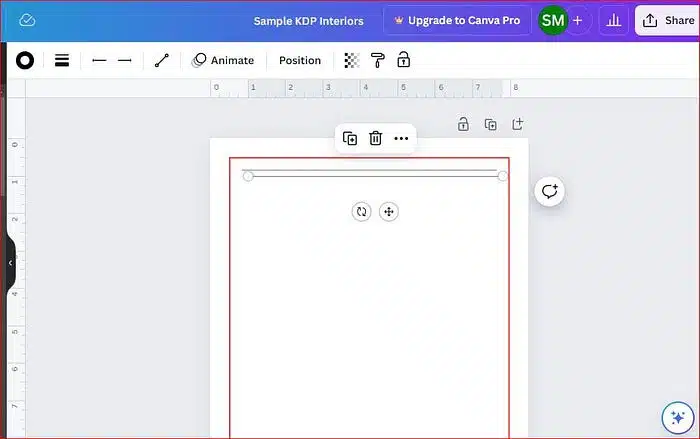
Now click on the second line, select the Position from the top menu and set the Start Y and End Y values to 1.19 inches.
This will add a line to line distance of 0.34 inches which is standard for creating a wide ruled paper.

Note: The Start Y and End Y for the first line is 0.85 inch, so you can add 0.34 in for the second line (0.85 + 0.34 = 1.19 inch).
Next, press Ctrl+D while the second line is still selected, this will add a third line 0.34 inch below the second line.
To add more lines, keep pressing D while holding the Ctrl key. Add as many lines as many fit in the red margin.
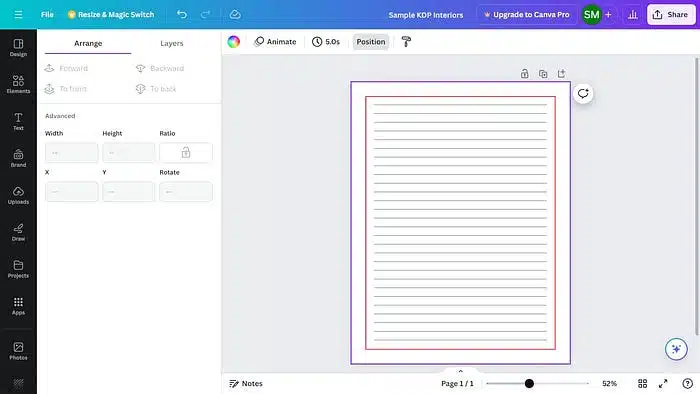
Finally, delete the red margin then go to the Share button, and download this as PDF Print.
Before downloading, you can duplicate this page 99 times to create a 100 page KDP journal interior.
This is how you can quickly make a KDP journal using Canva for free.
3. Create a KIDS Coloring Page
You can also create simple coloring pages for kids and turn them into a coloring book to publish on Amazon.
To create a coloring page, select the trim size. In my case it is 8.5 x 11 inches.
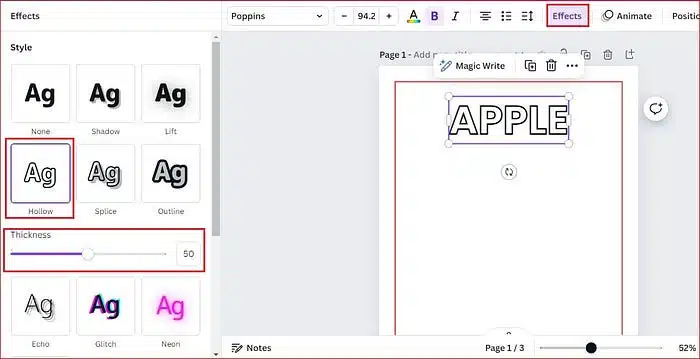
First of all go to the text tool and add a heading and change it to whatever text you want.

Next, change the font type to Poppins, it’s a kid-friendly sans-serif font perfect for creating educational books for kids.

Now select the text, click on the Effects button, and select the Hollow from the left side menu. This will create a colorable text for kids.
You can also play with the thickness of the outline, by default it is set to 50.
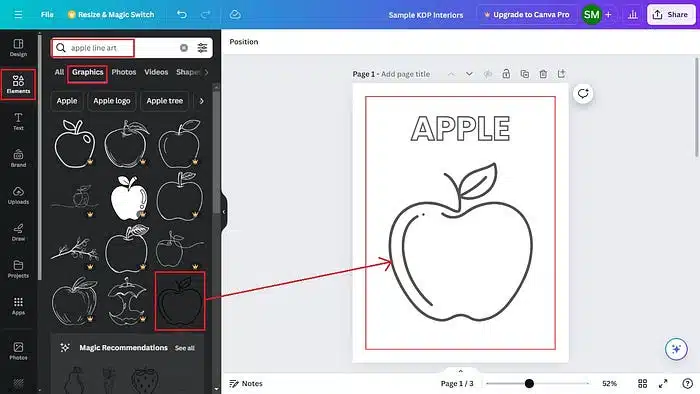
Next you can go to the Elements tab from the left menu, search for apple line art and under the Graphics section pick an apple image with a black outline.
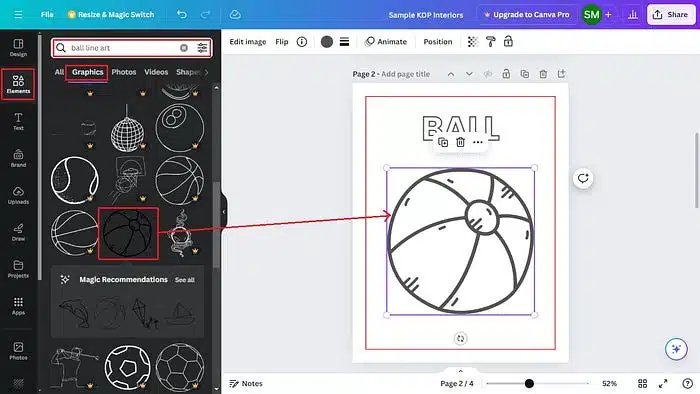
Now you can duplicate this first page, go to the second page and change the text to Ball. Delete the apple image.
Then search and add a Ball line art on the page to create a ball coloring page for kids.
This is how you can create 30 to 50 coloring pages for kids and download them as PDF Print.
If you can’t find any relevant line art from Canva Elements, you can always download them from other sites like Pixabay, Pexels or Creative Fabrica and upload them to Canva.
There you have it, now you can create KDP interiors on Canva.
As you saw, I used texts, shapes and images to create very simple book interior pages.
You can also use tables, charts, and icons to create more complex pages for your Amazon KDP books.
✨ Want to create kdp coloring books super fast? Check out the Coloring Book Maker Tool, which gives you access to over 9,250 hand-drawn coloring elements!
Conclusion!
In conclusion, creating KDP interiors using Canva is a relatively simple and cost-effective process.
By following the steps outlined in this blog post, you can easily create professional-looking interiors for your self-published books.
Canva provides a user-friendly interface and a wide range of design elements, making it accessible to both experienced and novice designers.
Whether you’re creating a journal, notebook, or coloring book, Canva has the tools and resources you need to bring your ideas to life.
Remember, the key to creating successful KDP interiors is to focus on quality and attention to detail.
By taking the time to carefully design your interiors, you can create books that stand out from the competition and attract readers.
So, get creative and start designing your own KDP interiors today!
Talk soon,
Subha
Read more about Amazon KDP Publishing!
Want to Publish Your First Amazon KDP Book the Right Way?
I created a beginner-friendly Amazon KDP course that walks you through niche research, book creation, and publishing — step by step.
👉 Access the Amazon KDP MasterclassPerfect for beginners starting with low- and medium-content books.

