How To Create Word Search Books Using AI And Book Bolt
Do you want to make money while you sleep by creating and selling your own word search books on Amazon? In this post, I will show the step-by-step process to create and upload your very first word search puzzle book on Amazon KDP.
So, stick around and make sure you read this guide till the very end…because this could be a game changer for your self-publishing journey.
Why Word Search Books?
Before you read any further, let me answer this question for you!. Puzzle books, especially word search or word find books, make a huge niche with a ton of sub-niches on Amazon.
This is an Evergreen area of the books market and can potentially bring you passive income for many years to come…
Even better, you can charge a lot more for these types of books when compared to simple lined journals and notebooks. What that means is you can earn more per sale resulting in higher profit margins for you!
And the best part, by creating and selling these word search puzzle books, you are adding value to the marketplace as there are a lot of people out there looking for these books for themselves, their kids, students, parents, friends and family members.
How To Create Word Search Books Fast

🎁 Download 15 FREE KDP Interior Templates
Save time and create beautiful low-content books faster with these 15 ready-to-use KDP interiors — completely free! Perfect for journals, planners, and activity books.
In this section I will cover the process of creating word search puzzles with the help of AI (ChatGPT). Before we start, let me discuss something fundamental to actually make money with these types of books.
Deciding a Niche Idea
They say, Riches are in Niches! The same is true for word search or any other type of book you may want to publish on Amazon or anywhere else.
To set the fundamental right, you need to choose a niche. In other words you need to pick an idea and validate it if it is worth pursuing or not. The process is also known as Niche Research.
When it comes to niche research there are many tools to help you out both free and paid ones. I normally use Book Bolt or Titans Pro to find low competition niche ideas for my low and medium content books.
For the sake of this tutorial, I will be using Book Bolt’s Keywords Tool to help me find a potential word search book idea. From the research module, I went to the Keywords option and typed Word Search in the search bar;
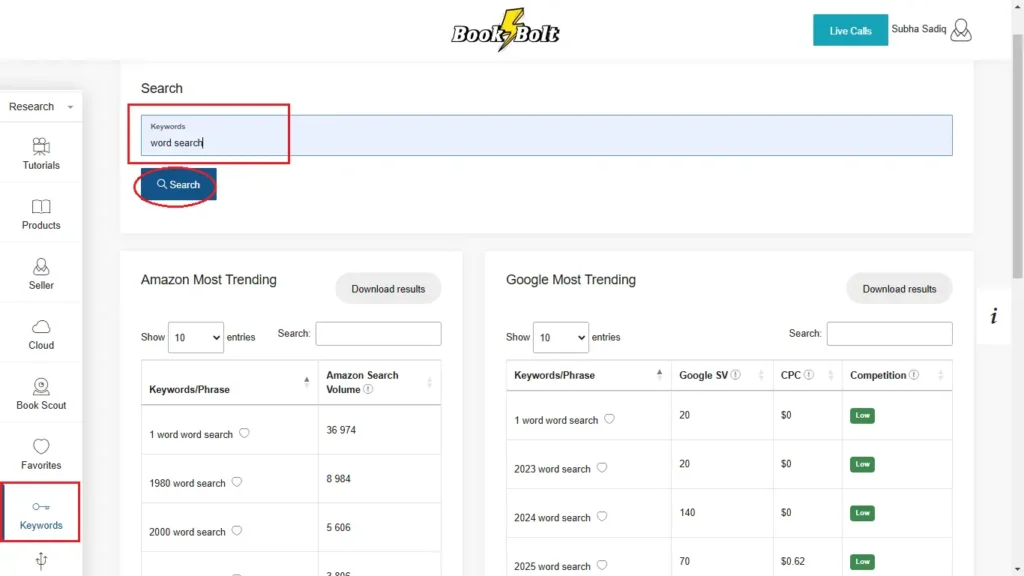
Upon hitting the search button, Book Bolt is showing me a lot of related keywords ideas along with helpful data like estimated Amazon Search Volume, Google Search Volume and competition;
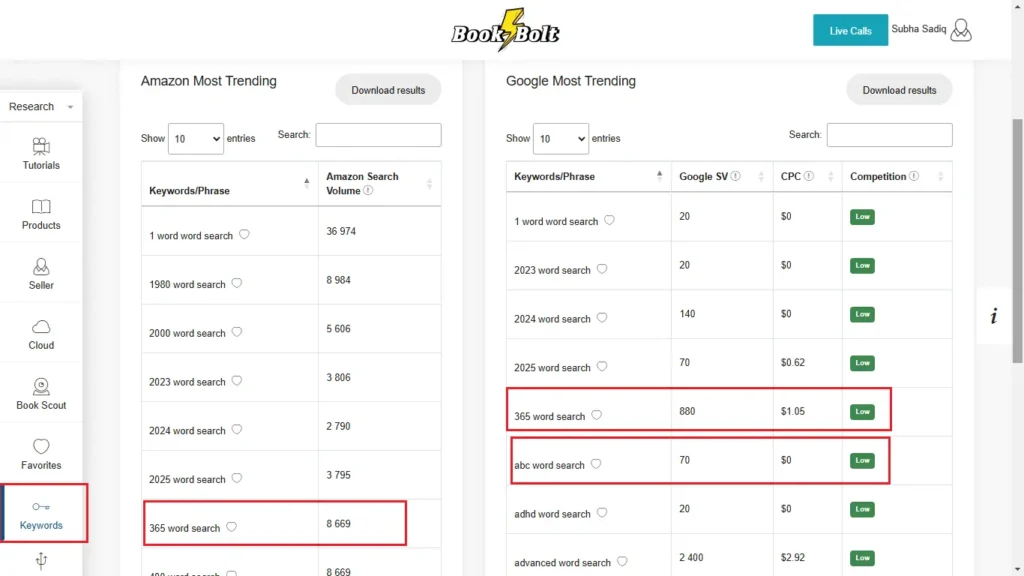
There are a handful of keywords with a decent Amazon Search Volume having a decent Google Searches as well. Like there is a keyword “365 Word Search”, it is an estimated Amazon SV 8,699 and Google SV as 880. The best part, competition is low for this keyword.
Book Bolt is also showing many other low competition keywords but for the sake of this Tutorial I will stick with “365 Word Search”.
Making a Word List Using AI
Once you are able to find a potentially word search niche, you will need a list of words related to that niche. This is where artificial intelligence comes into play, with a simple prompt like below you can generate hundreds of keywords in minutes if not seconds.
Here is a sample AI prompt I gave to ChatGPT to generate a word list related to “365 Word Search”;
“I am going to create a word search book to publish on Amazon. Generate a list of 500 single words related to ‘365 Word Search.’ Each word should be one word only (no phrases)”
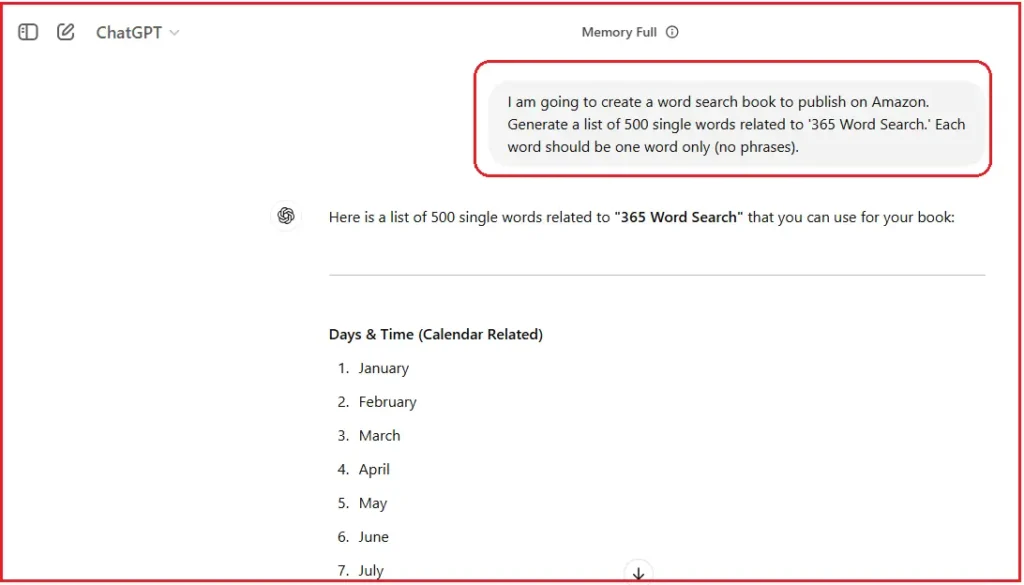
For this tutorial I am generating only 500 words, you can generate 1,000 or more words to make a full word search book.
Note: If ChatGPT stops while generating words, simply reply with “Continue” to make it generate a full list of 500 words or more. Also, if the word list has numbers and sections, you can reply “make a simple list without numbers and without sections.”
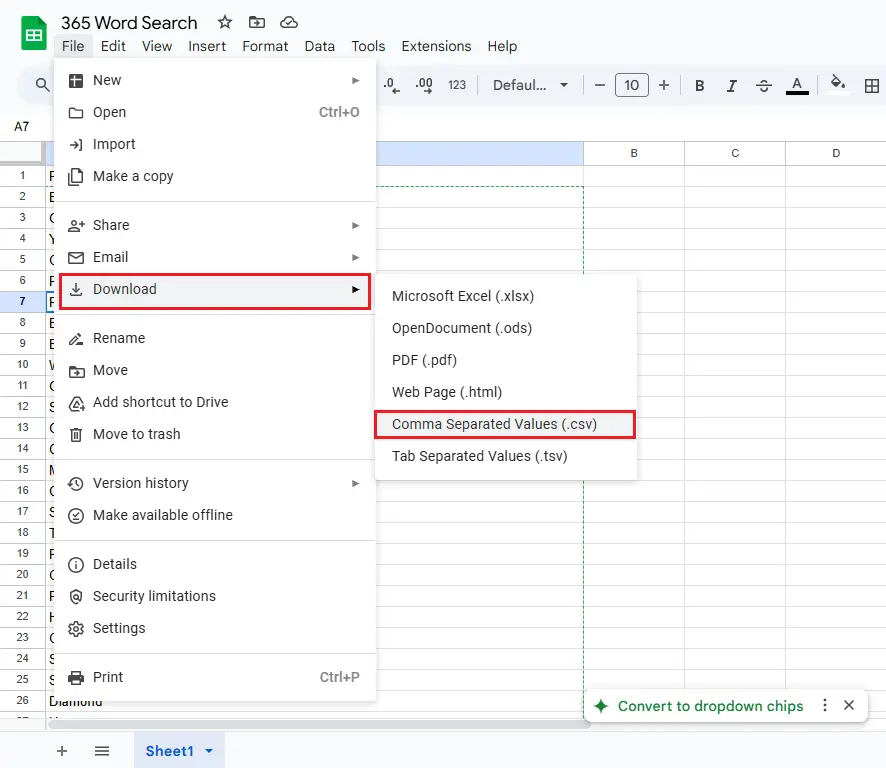
Once ChatGPT finishes the word generation, you can copy these words into a Google Sheets document and save it as a .CSV file.
Creating Word Search Puzzles in Book Bolt
Next comes the most exciting part, that is generating word search puzzles using Book Bolt. First of all you can access Book Bolt Studio as studio.bookbolt.io, if you don’t have a Pro subscription you can start a 3-Day Free Trial;
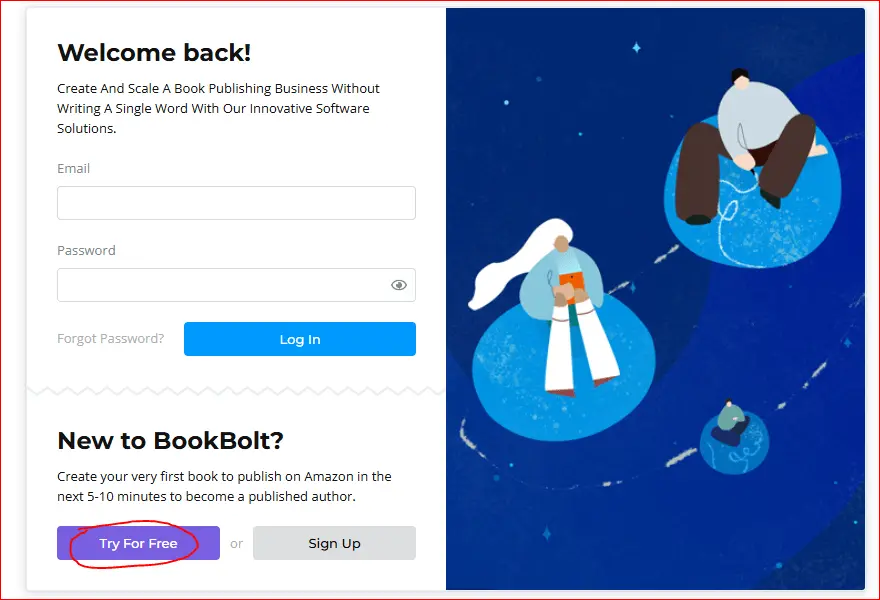
Once logged in, create a new Paperback Project as shown below;
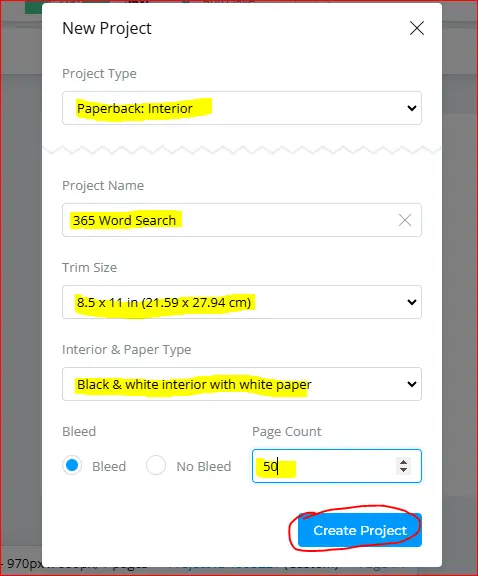
Below are details for my book. You can always choose a different Trim Size and Page Count, rest of the information would be the same.
Project Type: Paperback: Interior
Project Name: 365 Word Search
Trim Size: 8.5 x 11 Inch
Interior & Paper Type: Black & White Interior with White Paper
Page Count: 50
Your page count depends upon the number of puzzles and the solution pages. For example, if you have a 500 words list, and you are including 10 words/page, your puzzle pages would be 50.
And, if you are adding 4 solutions per page, then your solutions page would be 13. So, your total page count would become 50+13 = 53.
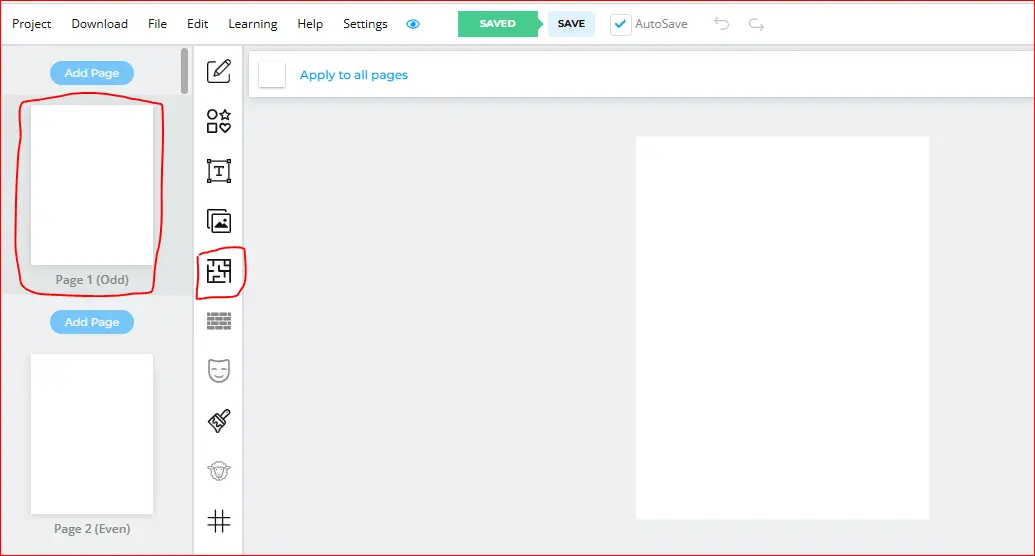
From the dashboard, select the very first page from the left and click on the Page Templates tab;
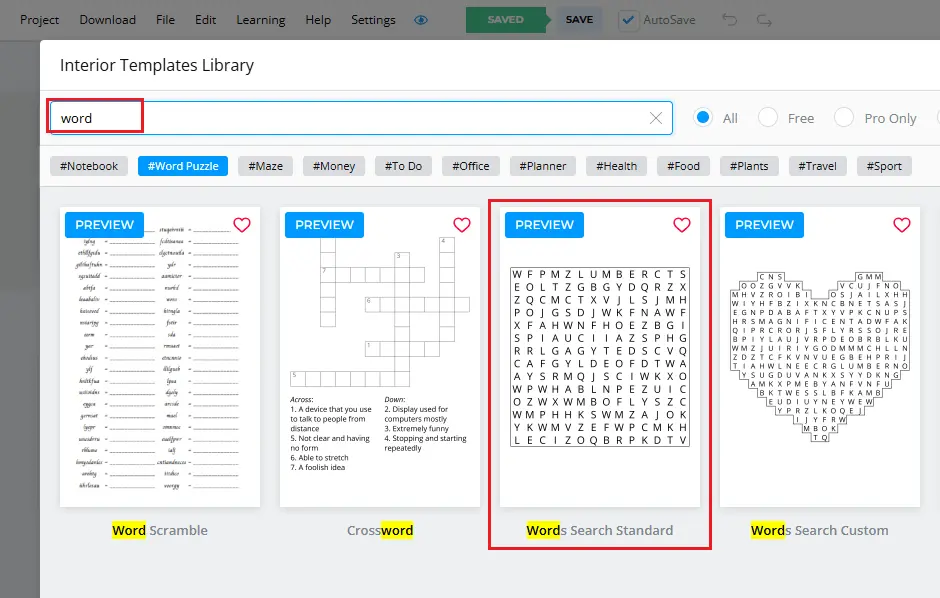
On the next window, type “Word” in the search bar to see the word search page templates. Book Bolt allows you to create Standard Word Search and Shape Word Search Puzzles. Here, I am going with the Standard option;
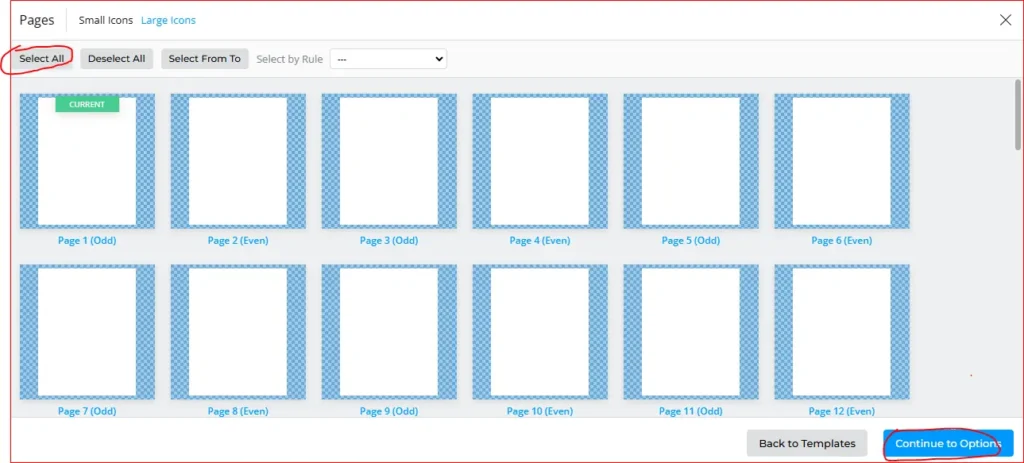
Next, select pages where you want to apply the word search template (you need to do a little math for that). I selected the first 19 pages as my list has only 230 words and I will add 12 words per puzzle page. Once done click Continue to Options;
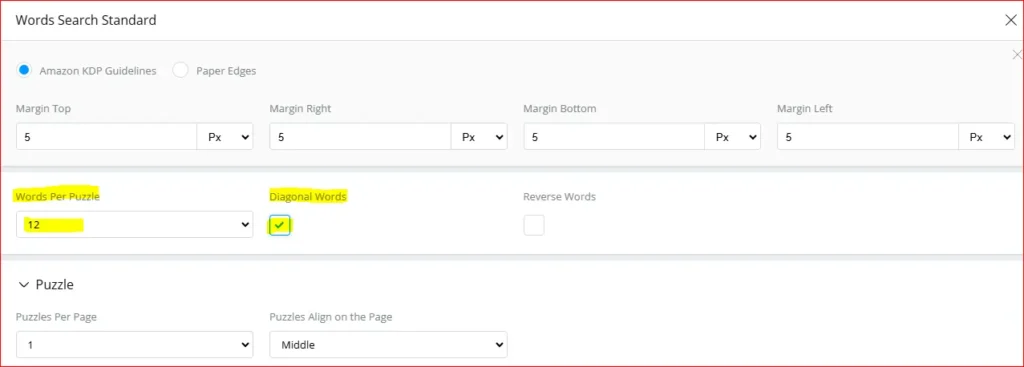
On the options page, set the Words Per Puzzle as 12 and check the Diagonal Words;
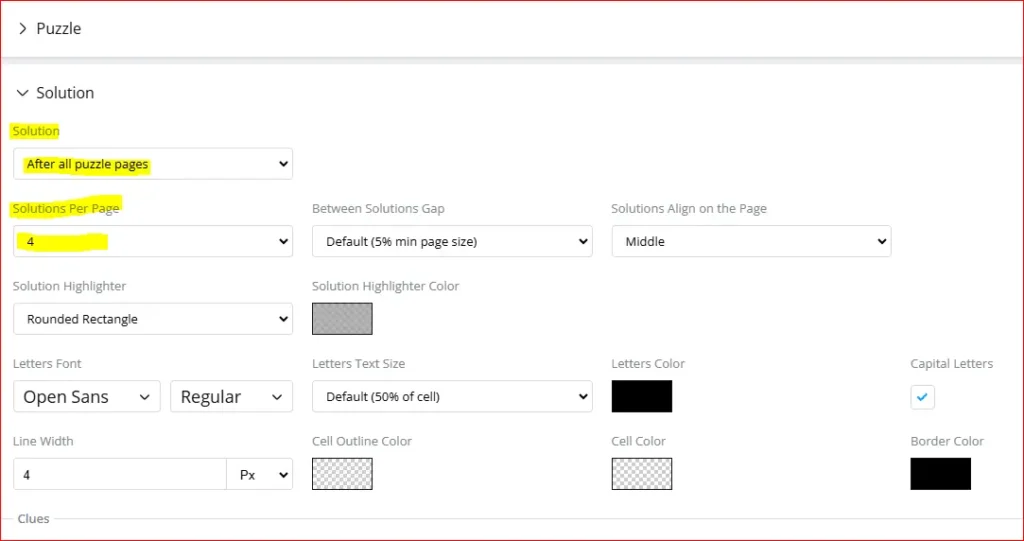
Then scroll to see options for the Puzzle and Solution page. Here you can leave most options as is except the Solution Per Page as 4 (by default it is set to 1).
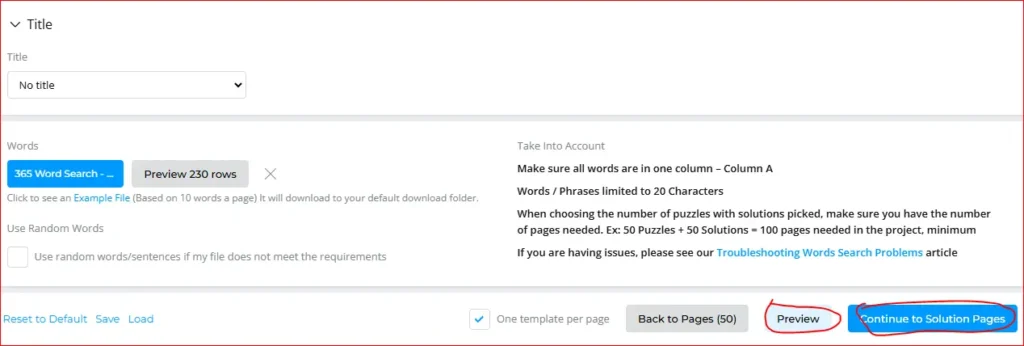
Set the Puzzle Title to No Title and finally move to the CSV file upload section. Here you can upload your list of words (.csv file);

As soon as you upload your word list, Book Bolt quickly processes and creates word search pages which you can Preview before moving to the next step.
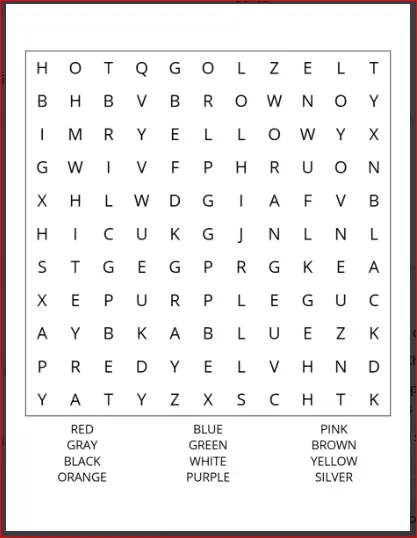
Below is the preview of one of the puzzle pages. Once satisfied with the look and feel of your puzzle page, you can Continue to the Solution Pages. If your book has 20 puzzle pages, and you are adding 4 solutions per page, then you need to select the last 5 pages as your solutions pages.
Once you hit the Submit button, the word search software quickly generates both puzzles and the solutions pages for you and takes you back to the Studio dashboard.
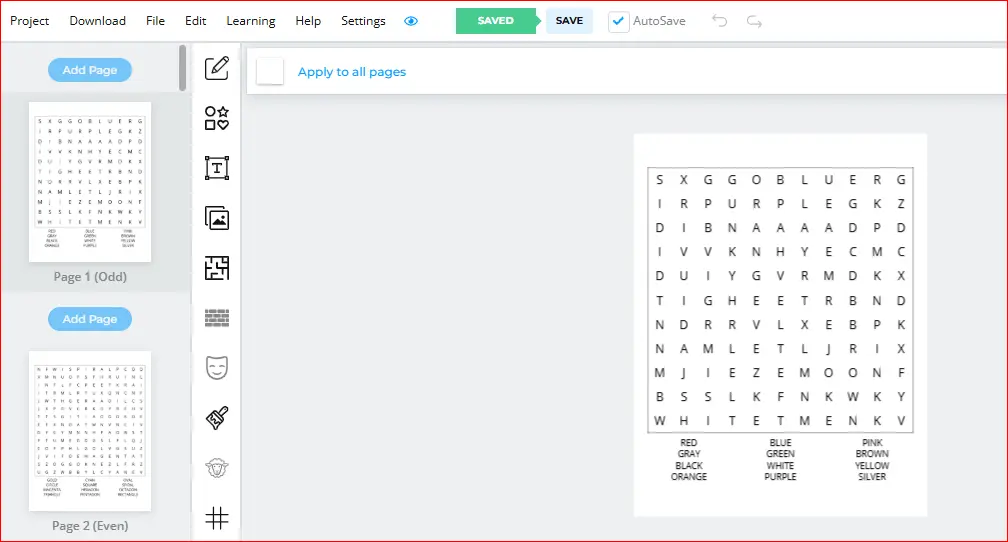
Finally, can reduce the puzzle size a bit and add a Custom Puzzle Title like “365 Word Search #1” using the Text tool.
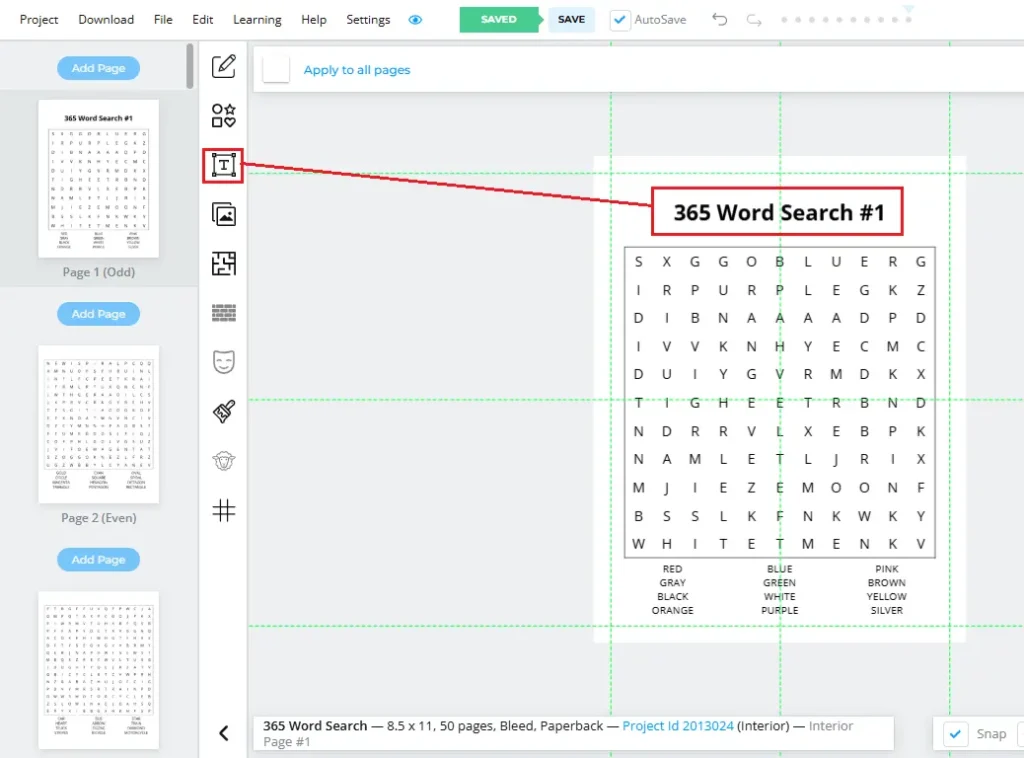
Next copy the puzzle title from the first page and paste it on the 2nd puzzle page and change the puzzle number to 2. Then repeat this for all puzzle pages.
Optional step: You can add some graphics toward the top or bottom of the puzzle page to give it a unique look. This will take you some extra time but it will make your word search more appealing for customers.
Downloading Puzzle Pages
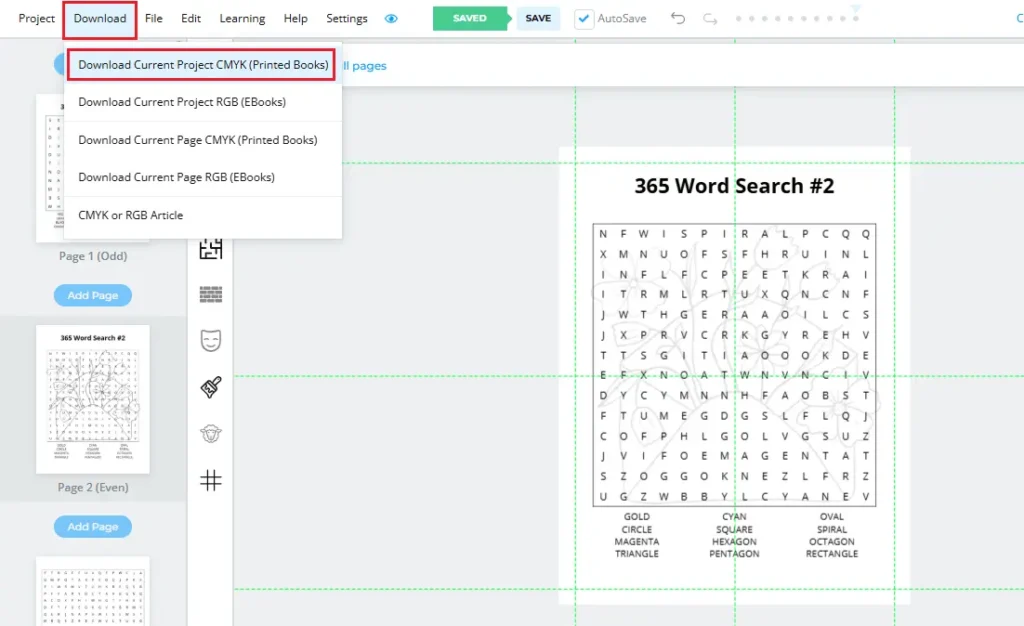
Once you are done with customizing your puzzle pages, got to the Download button from the top-left corner and choose Download Current Project CMYK (Printed Books);
Congratulations! You have just created your very first word search book interior using the power of AI and Book Bolt Studio.
How To Create a Word Search Book Cover
Your book’s cover is the most important part of your book as it is the first thing your customers see while scrolling Amazon. Ideally, you should outsource your book covers from Fiverr or Upwork, it can cost you from $5 to $10 per cover.
However, if you want to create the book cover yourself you can follow along with the tutorial below.
There are many tools you can use to create book covers but for this tutorial I will be using Book Bolt Studio. Before that, let me share some tips for creating a better book cover.
Tips for Creating Better Book Covers
Below are some key points you need to consider while creating any book cover;
- Looking at the competitors: Do a quick search on Amazon and see others books ranking on the first page
- Fonts and Colors: Make note of fonts and colors they are using
- The main Element: What are the main elements they are using on their covers.
This little exercise will give you a better idea of the type of cover you need to create to make sales.
Create a New Cover Project
Book Bolt Studio allows you to create a book cover only project as well. Go to the Projects tab, Create a new project and make sure you are using the same Trim Size, Page Count and other settings as you did for the book interior.
The only difference here is, you are creating a Paperback Cover only project.
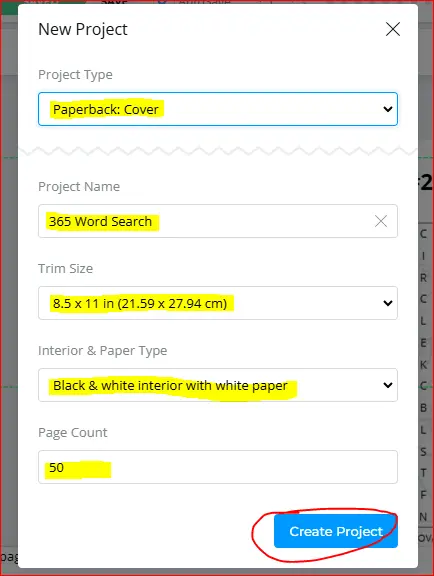
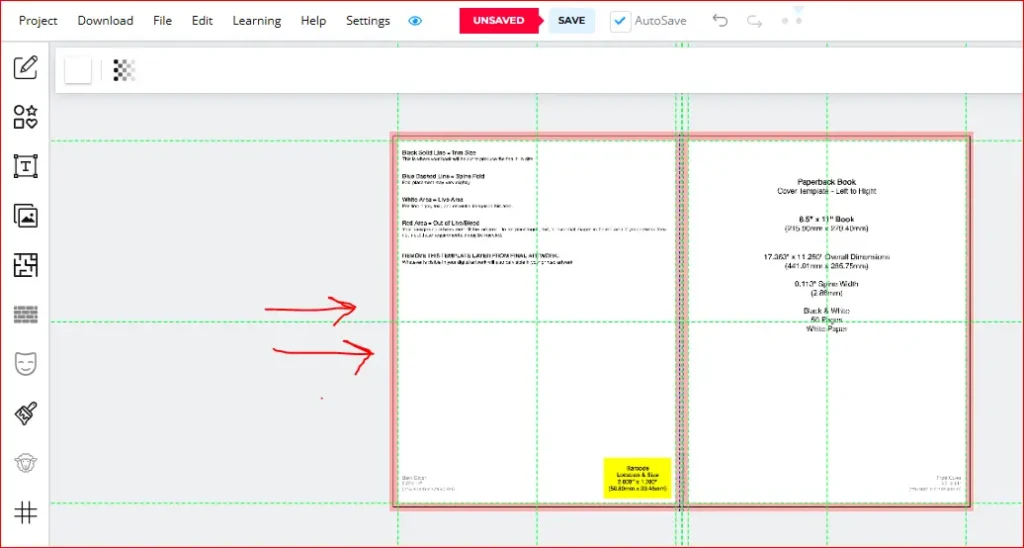
Once you create a new Paperback Cover project, you see the below black canvas having a KDP Cover template;
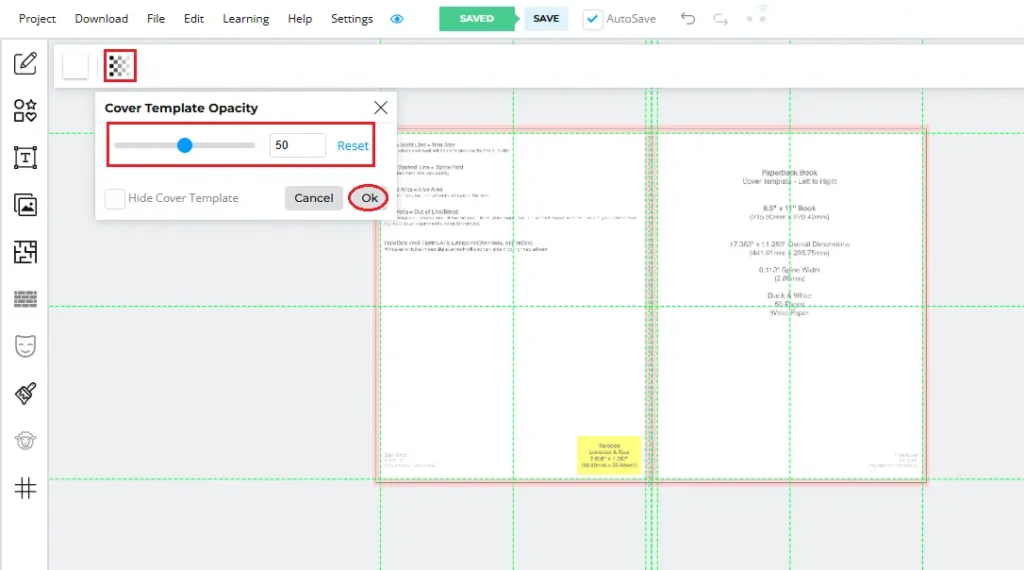
You can lower the opacity of the cover template while creating your book cover. Just click on the gradient button and move the slider;
Adding Text, Elements and Images
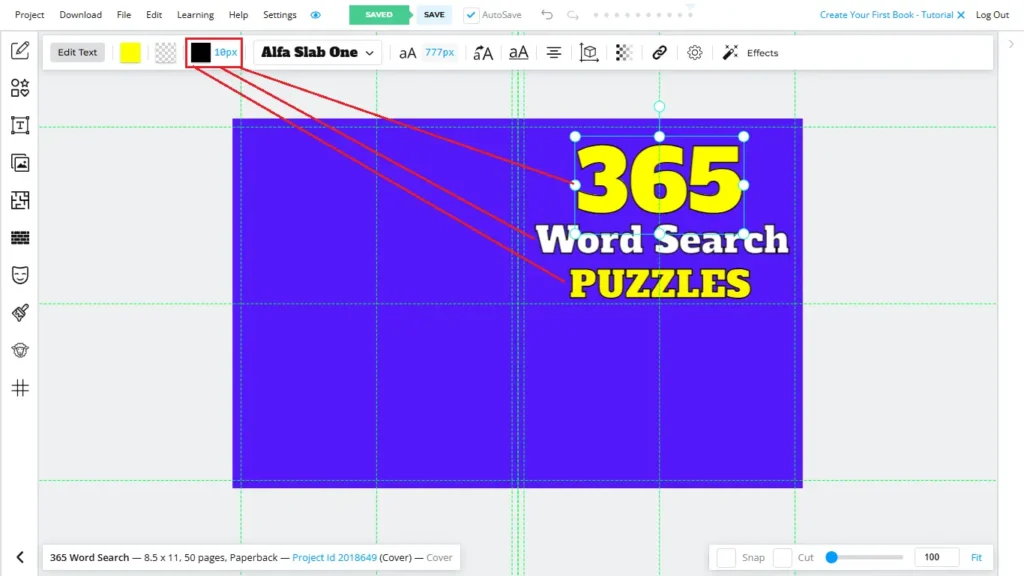
I added the book title using the text tool, and changed the font to Alfa Slab One. I also change the background color and text colors.
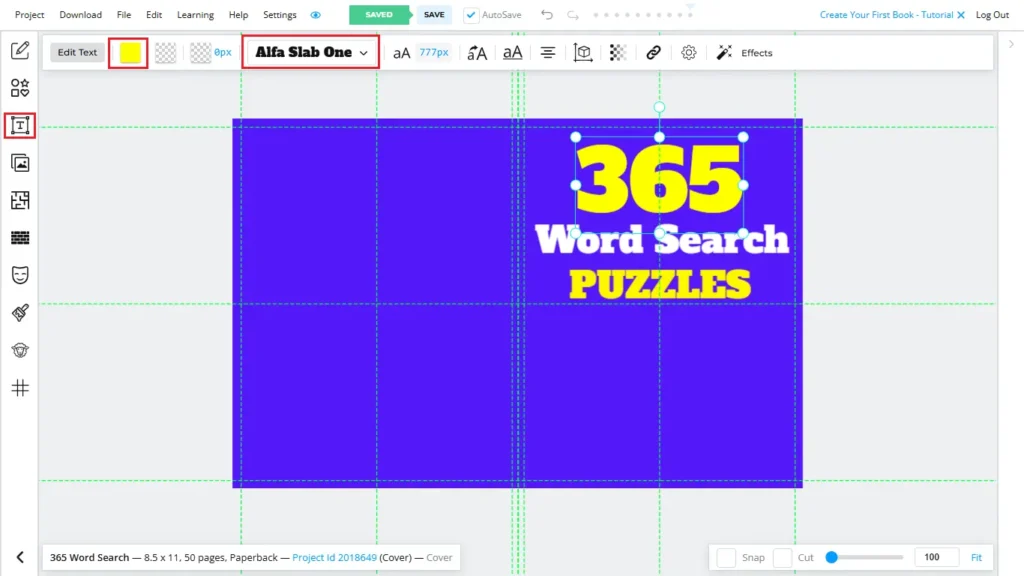
You can also add outline/stroke to your title from the top menu. I use a black stroke of 10px with for all the three text layers;
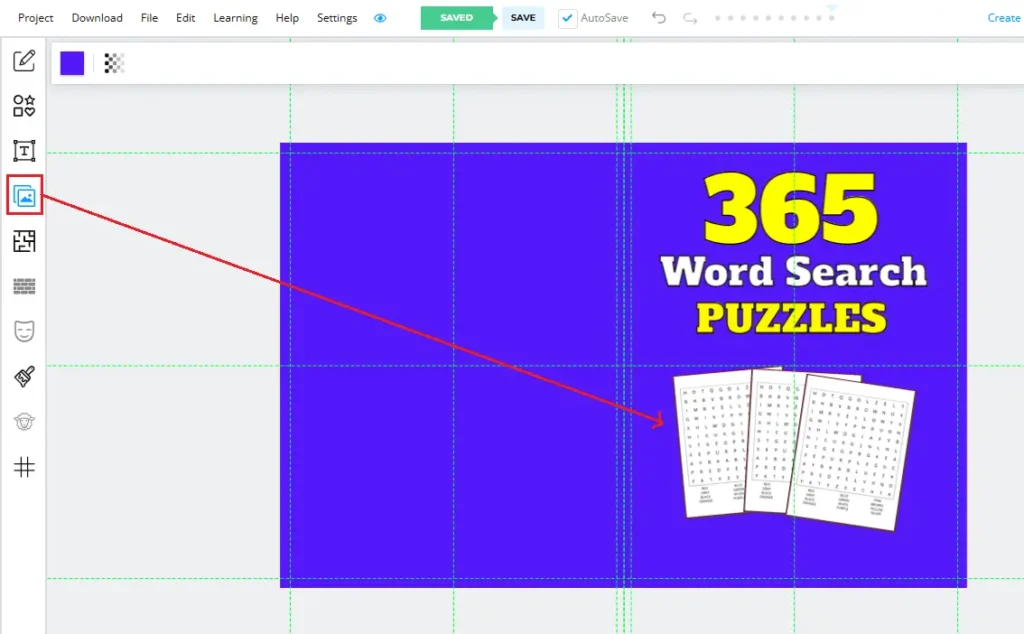
Then I uploaded one of my word search pages by going to the File Library. I duplicated the same page three times and placed it on the front cover;
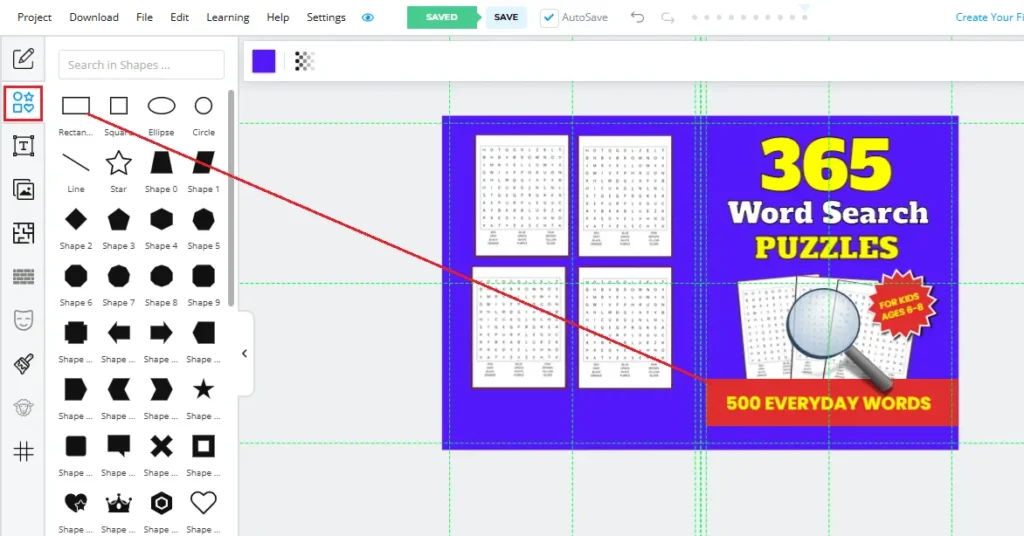
Then I added a shape toward the bottom of the front cover and changed its color to red. I wrote a text box over this red shape and I added another shape and wrote the text saying “For Kids Ages 6-8”.
Finally, I added four word search pages (actually 1 page duplicated 3 times, you should add unique pages though) to the back cover. With that my word search cover is ready to download.
I went ahead to the Download button and downloaded my cover project as CMYK.
Note: This cover is not my finest work, for my actual books I spend more time creating covers for my actual books.
How to Upload Your Word Search Book on Amazon KDP
Uploading your book on Amazon KDP is a straightforward process. First of all, from your KDP Bookshelf, click on the +Create button.
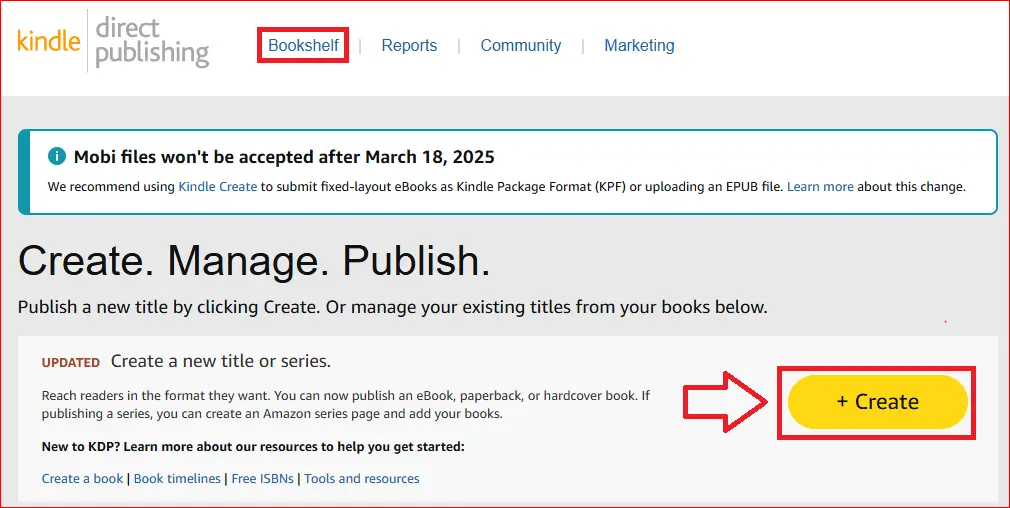
From the next screen, click on Create Paperback. It will take you to the Book Details Page.
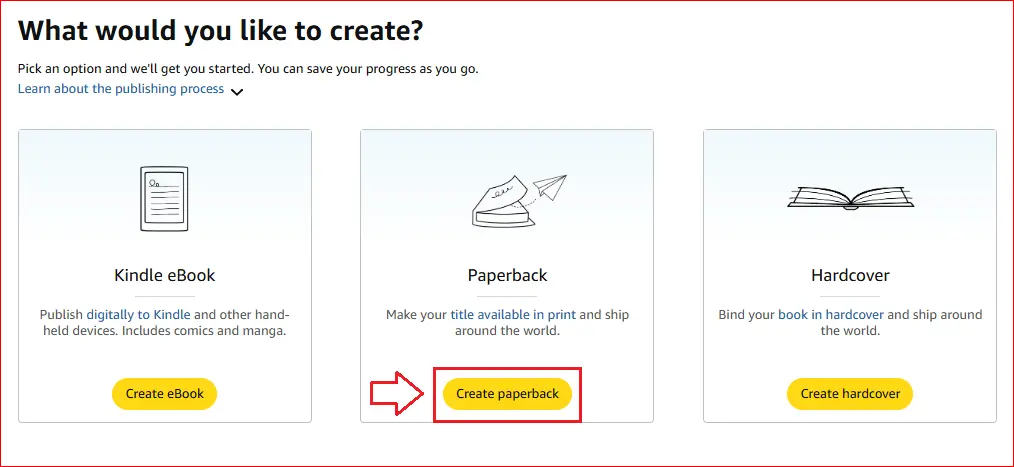
You can write your book title, subtle and description by taking inspiration from already published word search puzzle books on Amazon, however, don’t copy anything from any book.
You can also, give simple prompt to ChatGPT which goes something like this;
“Generate a subtitle and book description for this word search puzzle book. I need this to publish on amazon kdp. Make sure you are not using any copyright and trademark words and phrases while doing that. My book title is: 365 Word Search Puzzles”
Enter Your Book Title and Subtitle
On top of the book details page, you will see separate boxes for the book title and subtitle. Though the book subtitle is optional, however, you should use this for describing your book and adding more relevant keywords.
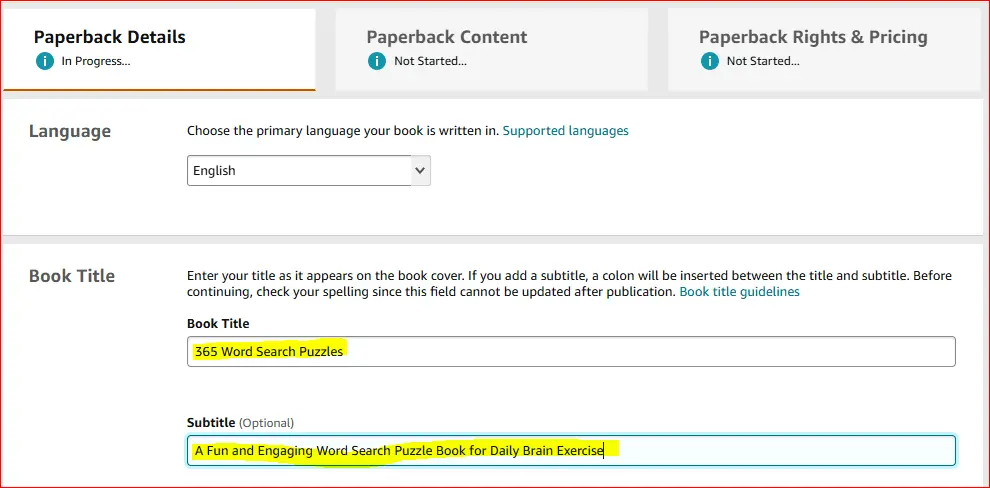
Your title should ideally be no more than 60 characters, however, if you want to make it a bit longer then you can keep it between 80 to 100 characters.
Enter Author & Contributors Name
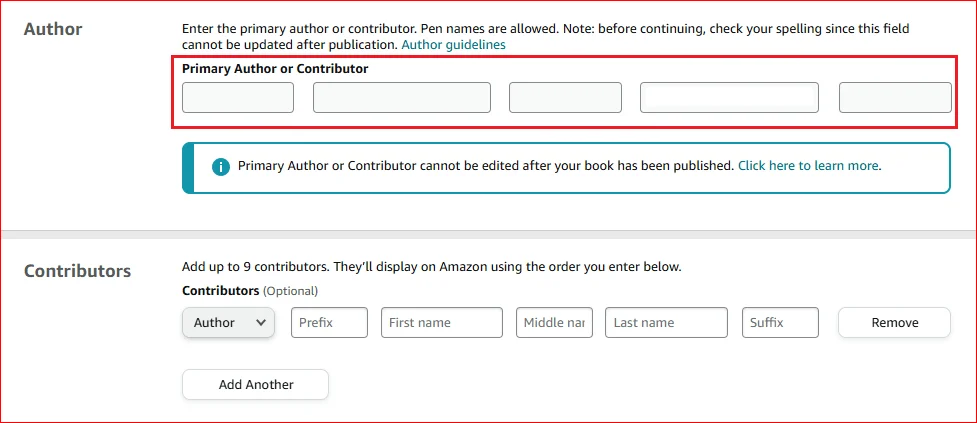
Next, you can add an author name, in most cases, it would be your first and last name. However, you can also use a pen name. Make sure you are not using any keyword phrase as the author’s name.
Also don’t use famous brands’ names, or copyrighted and trademark words, as this violates KDP’s guidelines.
Add Book Description and Verify Your Publishing Rights
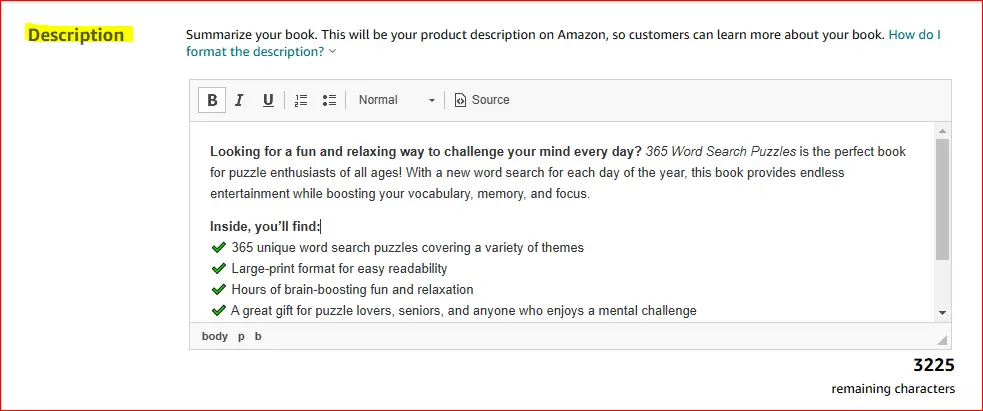
Your book description should include the keyword benefits and features of your book. You can optimize your book description by adding bullet points, headings, and a call to action.
Just below the book description, you will see an option to confirm the publishing rights.
Choose Relevant Keywords and Categories
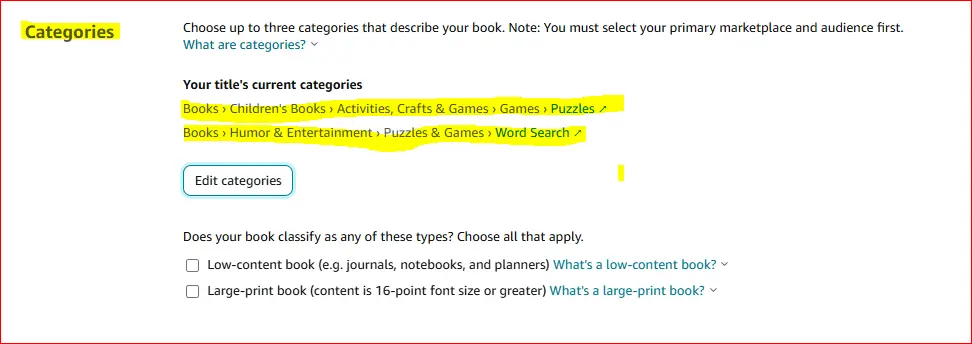
KDP allows you to add up to three relevant book categories. While choosing categories for your books, make sure they are closely related to the type of your books. Adding books to wrong/irrelevant categories violates KDP’s guidelines and can result in account suspension or termination.
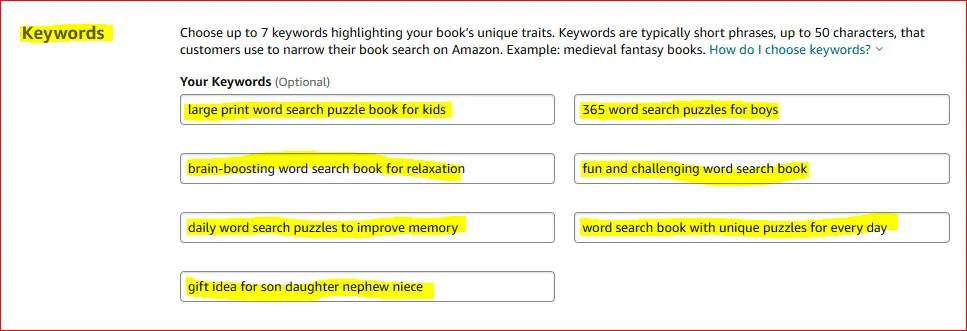
Next, add 7 backend keywords relevant to your books. Again don’t use any copyright or trademark words here. Also don’t use any irrelevant information.
Publication Date
Below the book categories, you will see options for publication dates. You can either release your book now or set a future date.
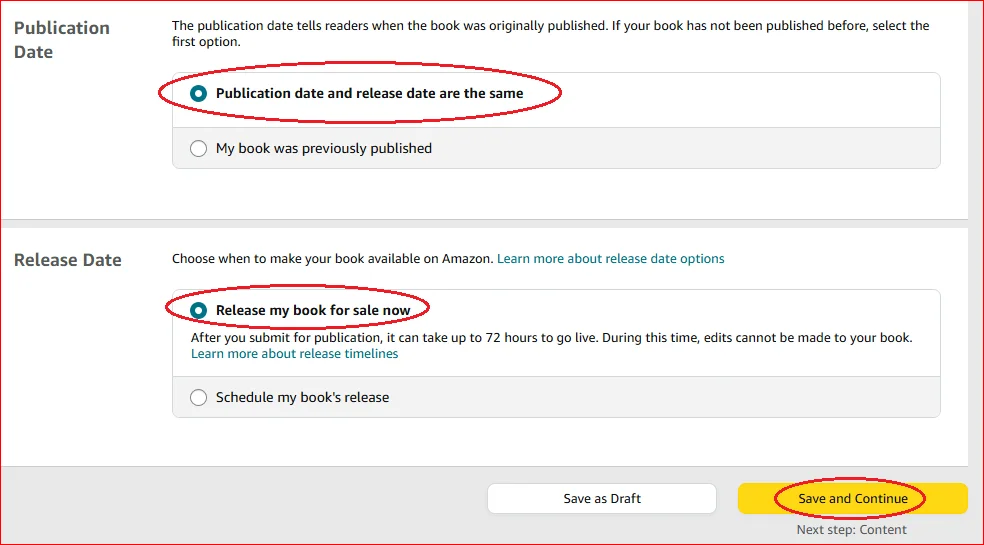
Lastly, double-check your book details and click the Save and Continue button at the bottom of the page. This will take you to the book content page.
Book ISBN & Printing Options
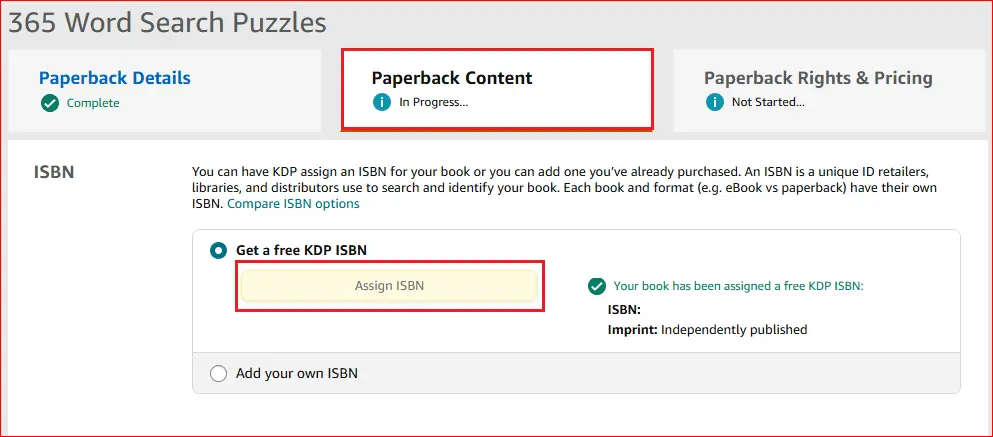
At the book content page, you will see ISBN options. KDP gives you a free ISBN for medium-content books like puzzle books, coloring books, activity books, and other high-content books.
Just below the ISBN, you can select the print option. KDP offers the following four printing options;
- Black & white interior with cream paper
- Black & white interior with white paper
- Standard color interior with white paper
- Premium color interior with white paper
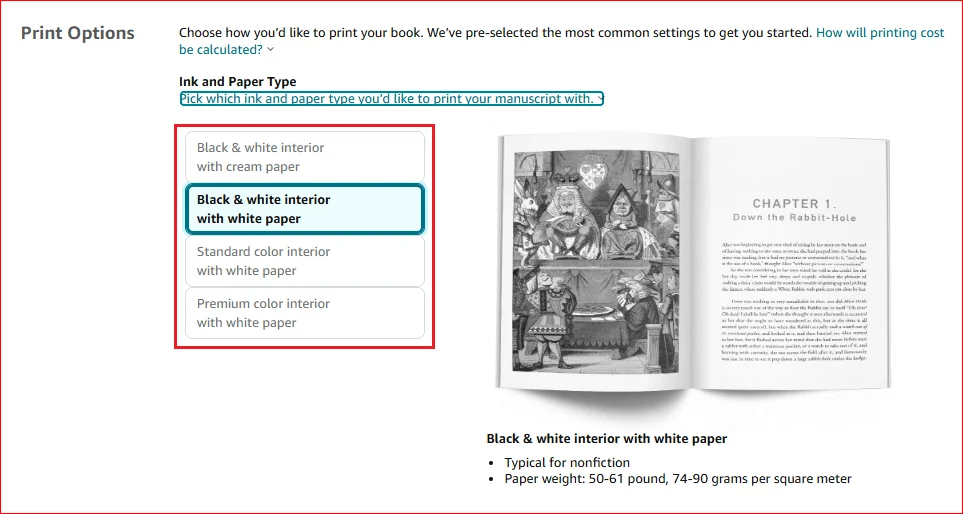
Black & white interior with white paper is the most common option for both paperback and hardcover books.
Trim Size, Bleed & Cover Finish
Below the print options, you can select the trim size for your paperback book. It could be 8.5×11, 6×9, 7×10, 8×10 or 5×8 inches.
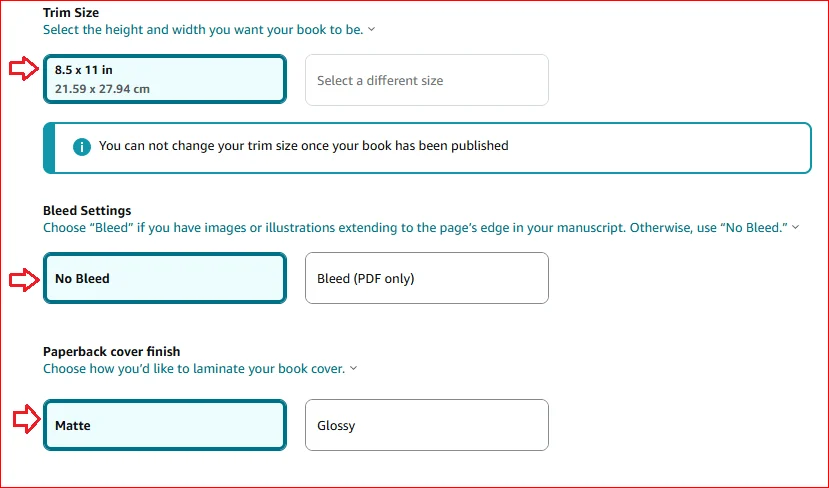
Then you can set the bleed option, your book can be no bleed or with bleed. Mine has no bleed, therefore, I have selected the relevant option.
When it comes to cover finish, you can choose from Matte or Glossy. The matte finish gives your book a natural look as it is less reflective. Where the glossy finish is shiny which is suitable for covers with dark tones.
Upload Your Manuscript and Cover
Next comes the most exciting part of the process. Here you will upload your book manuscript (book interior) and book cover. First, click on the Upload Manuscript button and select the book interior file (PDF only) from your PC/Laptop.
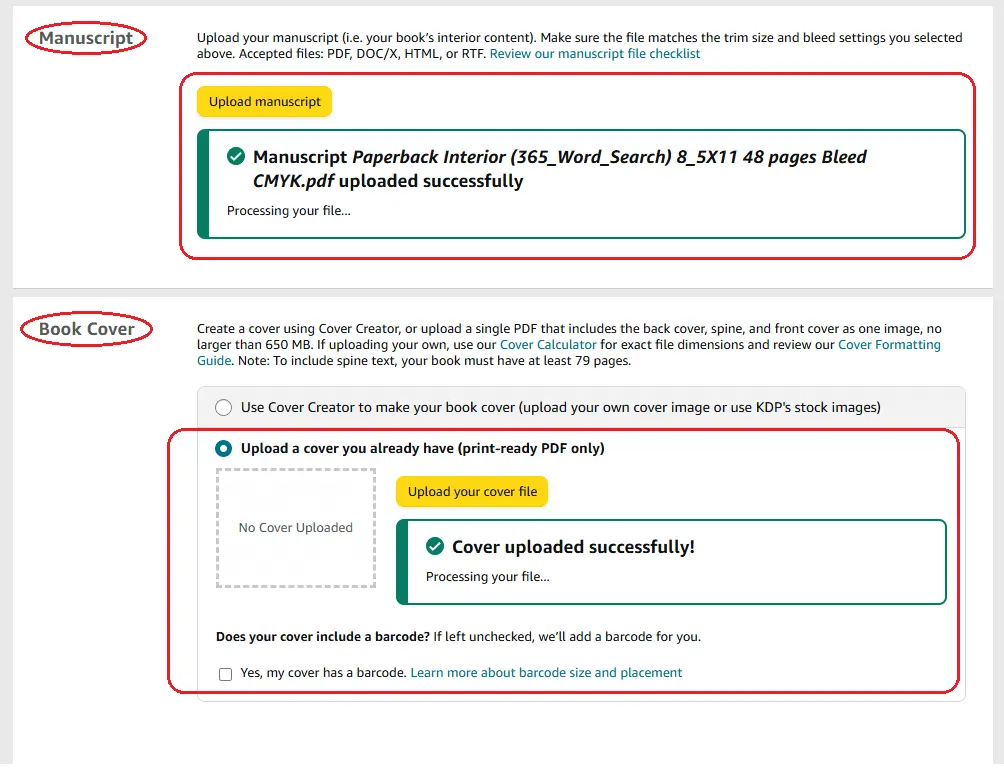
KDP will first process your book interior file, meanwhile you can start uploading your book cover by clicking on the Upload your cover file button.
AI Content Confirmation
Toward the end of the book content page, you will need to confirm whether your book has any AI-generated content or not. Choose the relevant option and click on the Save and Continue button.

Book Preview
Once both your interior and cover files are processed, you can preview your book. Just click the Launch Previewer button and see if KDP finds any errors with your files are not.

If everything looks good, simply click the Approve button, it will take you back to the book content page.
Now, you can click on the Save and Continue button to move on the 3rd and final step.
Select Your Pricing and Royalty Options
On the Paperback Right & Pricing page, you can first choose the territories and primary marketplace. If you want to sell your book worldwide on all Amazon marketplaces, select All territories (worldwide rights).
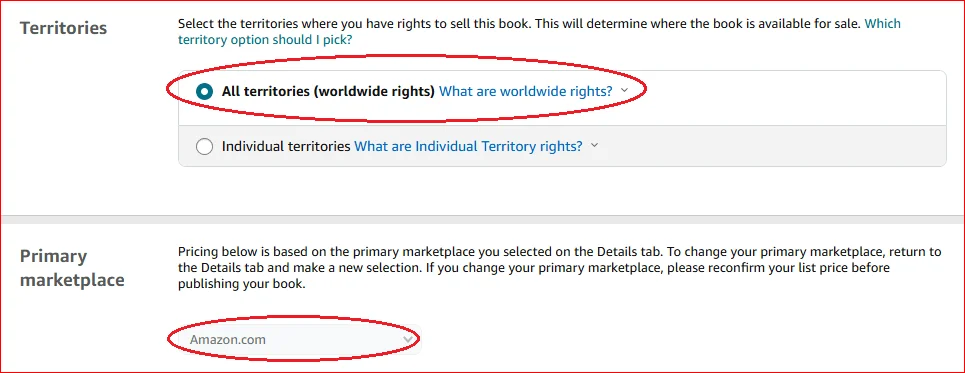
And if you want to publish your book in a specific marketplace click on the 2nd option (Individual territories)
Pricing Your Word Search Book
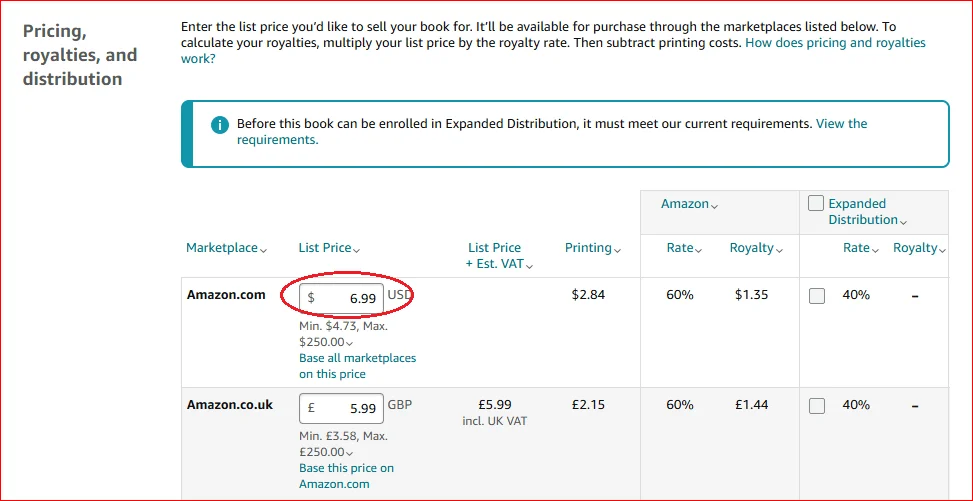
Next, you can set the price for your book in different marketplaces. Once you add your book price in the US marketplace, KDP automatically adds the price for all marketplace based on the price in the US marketplace.
Submitting Your Book for Review
Finally, you can scroll down and click on the Publish Your Paperback Book button. This will submit your book for a review process which can take up to 72 hours or more.

Review process can take less time for some books and it can take up to 1 or 2 weeks for others.
How To Promote Your Word Search Books
Promoting your KDP books is super-important, especially during the first few weeks of the book launch. Below are some of the most effective ways to promote your books on and off Amazon.
Using Amazon Ads
Amazon ads/KDP ads are one of the best ways to promote your KDP books. KDP allows you to run both auto and manual ad campaigns for your eBooks, paperbacks, and hardcover books.
Read more about Amazon ads here;
Using Social Media and Email Marketing
In addition to Amazon ads, you can also promote your books on social media platforms like Facebook, Instagram, Pinterest, and Twitter.
Email marketing is yet another way to promote your self-published books; all you need is a landing page and a freebie (e.g., a checklist or sample chapter) to offer in exchange for the customer’s email address.
To grow your email list, you can add a QR code to your landing page either on the first or the last page of your books.
Over time, you can build a database of customers who are interested in your books. Once you have a list of customers, you can easily promote your newly released book to them.
Final Thoughts
There you have it! In this detailed blog post I have shared a step-by-step process to research, create and sell your very first Word Search Book on Amazon KDP. I sincerely hope that you have learned a lot from this guide.
To streamline this whole process and create a wide range of other low and medium content books I highly recommend Book Bolt, an all-in-one KDP tool both for beginners and advanced self-publishers.
The best thing is, you can get 20% Off on Book Bolt plans with my coupon code subha20.
👉 Book Bolt: https://bit.ly/Book_Bolt (20% Off Coupon Code: subha20)
That’s all from me today! See you next time!
Thanks,
Subha
Want to Publish Your First Amazon KDP Book the Right Way?
I created a beginner-friendly Amazon KDP course that walks you through niche research, book creation, and publishing — step by step.
👉 Access the Amazon KDP MasterclassPerfect for beginners starting with low- and medium-content books.

