How To Create a Coloring Book From Scratch for Amazon Kdp
Last updated on October 9th, 2025 at 03:35 pm
Welcome to my blog! My name is Subha Malik and in this blog post, I will share with you How to Create a Coloring Book from Scratch.
Last week I was creating a coloring book for toddlers and while creating that book I thought why not share the exact process with you guys!
Creating a coloring for amazon kdp is a three-step process that I personally follow and you are going to learn the same in today’s post. And these steps involve;
- Finding specific graphics that can easily be converted into coloring pages
- Converting those graphics into coloring pages using a software
- Importing the coloring pages in PowerPoint to create a print ready pdf file
These are the same steps I followed to create a coloring book for toddlers, which I recently published via Amazon kdp. So, without further ado, let’s just dive in…
Related posts;
Creating a Coloring Book From Scratch
🎁 Download 15 FREE KDP Interior Templates
Save time and create beautiful low-content books faster with these 15 ready-to-use KDP interiors — completely free! Perfect for journals, planners, and activity books.
Below you will learn the above-mentioned steps in detail. So don’t skip and read until the very end…
Before doing this you need to have a niche in mind. For this demo post, I will choose a Coloring Book Flowers, or Flowers Coloring Book.
👉 I have also reviewed 5 Best KDP Courses to start and scale low content and medium content publishing business, you can read the blog post here.
# 1 – Finding Graphics
The very first step in creating a coloring is to find the graphics in SVG format. SVG stands for Scalable Vector Graphics which you can import and edit in any design software like Affinity Designer, Abobe Illustrator, Gravit Designer, or Inkscape.
I personally use affinity designer which also comes with a 30-day free trial. And at the end of your 30-day free trial, you can get it for as low as $25 (50% off of the original price.)
Anyways. we were talking about finding graphics in SVG format. So, there is a number of sites where you can get these graphics like Pixabay, Pexels, and Vecteezy.
I personally use Creative Fabrica to get all my graphics for my low-content books. It’s a paid service and you can use their all-access membership to get unlimited graphics, fonts, and crafts.
For my own book, I have downloaded over 100 different graphics in SVG format. Among those graphics, there are also flowers, so in this post, I will show you how to create a coloring page from an SVG graphic.
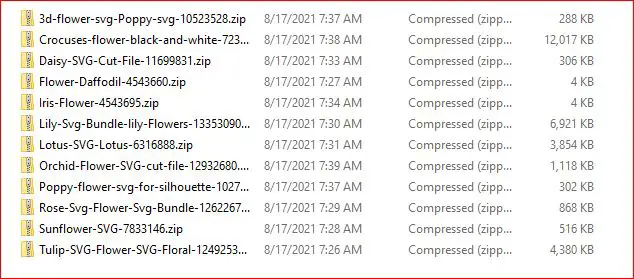
Above you can see different flower graphics as a zip folder. I extracted these all to separate folders…
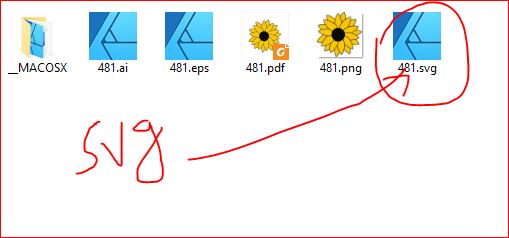
As you can see, I have extracted the sunflower folder and it has a .svg file as well which I will open in Affinity Designer to create a coloring page.
So, this completes our first step of creating a coloring book from scratch.
# 2 – Converting Graphics to Coloring Pages
In this next step, I will convert an SVG file into a coloring page using Affinity Designer. You can do the same in Gravit Designer or Inkscape.
First of all, we will set up a page in Affinity Designer. Most coloring books are sized at 8.5″ x 11″, below are the dimensions from our coloring page;
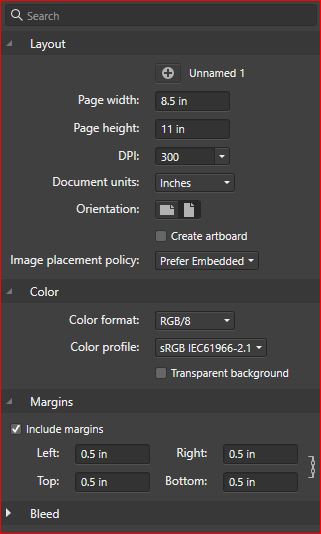
As you can see, the page width is 8.5 inches, the page height is 11 inches, the DPI is 300 and the margins are 0.5 inches. Next, we will hit create, and below will be our coloring page template.
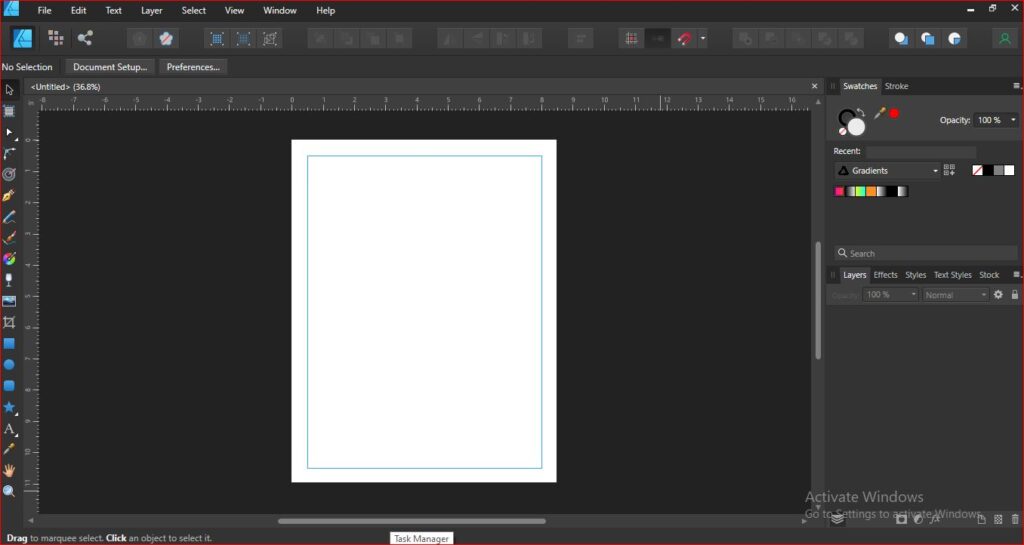
Next, we will open the SVG source file. For demo purpose, I will open a sunflower SVG file and convert it into a coloring page.
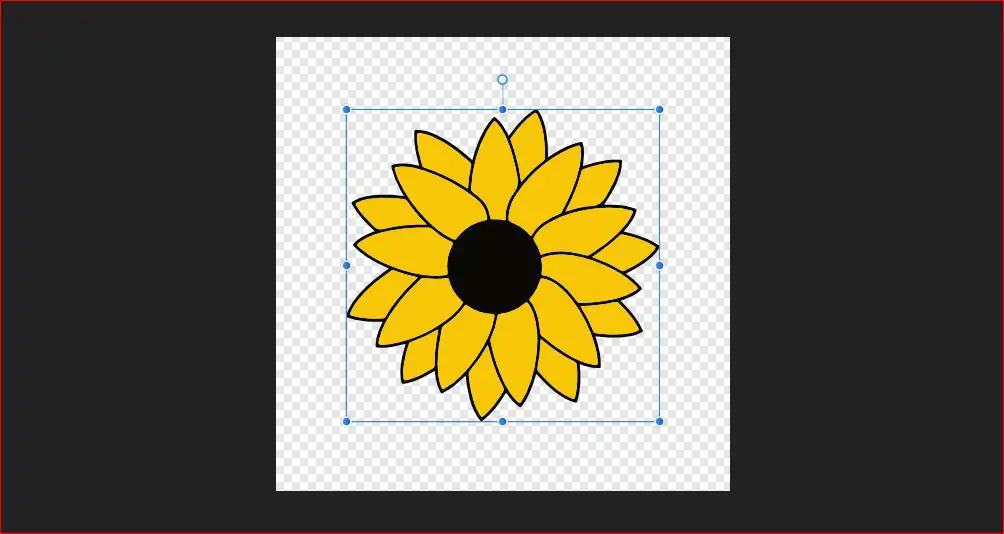
Now I will press Ctrl+A to select all layers and then Ctrl+C to copy and move over the coloring page template and press Ctrl+V to paste this sunflower SVG file.
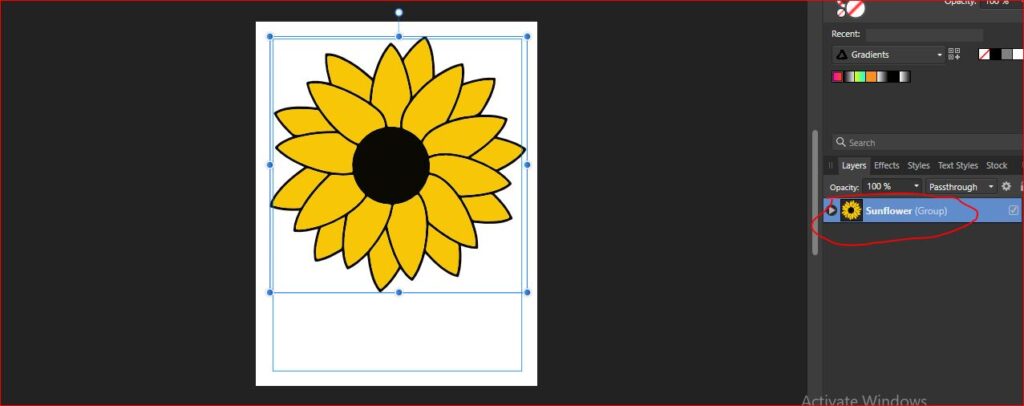
After pasting the sunflower file here, I pressed Ctrl+g to group all layers and named it Sunflower. Now we have our coloring page set up and also have pasted the SVG here on the page. Next, we will convert this into a coloring page in two steps:
Step # 1 – Changing the Fill Color
To change the fill color, I will select the sunflower layers (group) and the go-to Swatches panel towards the top left and click on the fill color and change it to white…
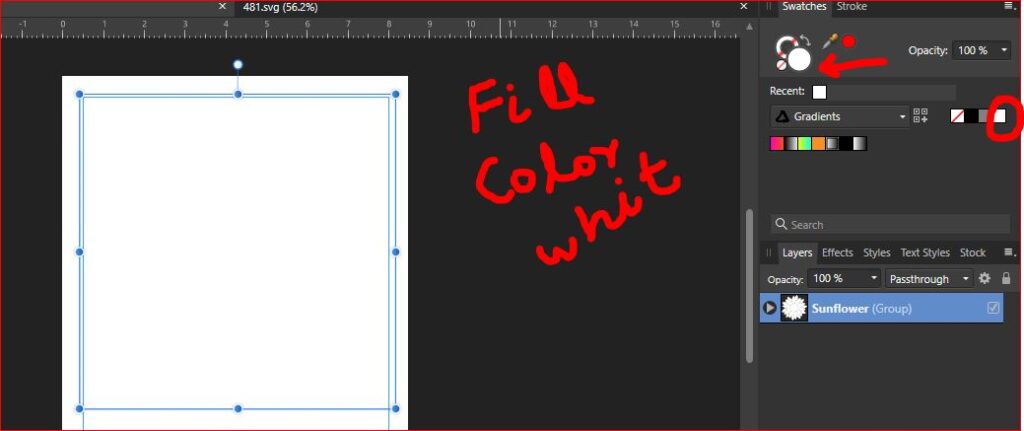
By doing so, our flower will become invisible, as you can see in the above screenshot.
👉 Want to create kdp low content books fast? I have shared a step-by-step process of creating and publishing a kdp journal in under 60 minutes, you can read it here.
Step # 2 – Changing the Stroke Color
Next, we will change the stroke color. To do that just select the stroke option from the swatches panel as shown below.
Just change the stroke color to black.
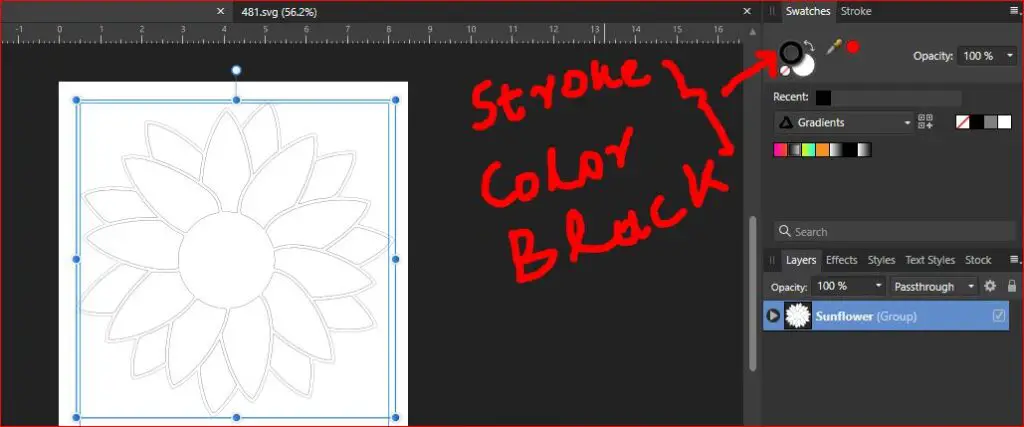
Next, I will change the thickness of the stroke. To do that, just click the Stroke panel next to swatches and then move the slider from right to left to increase the thickness of the stroke.
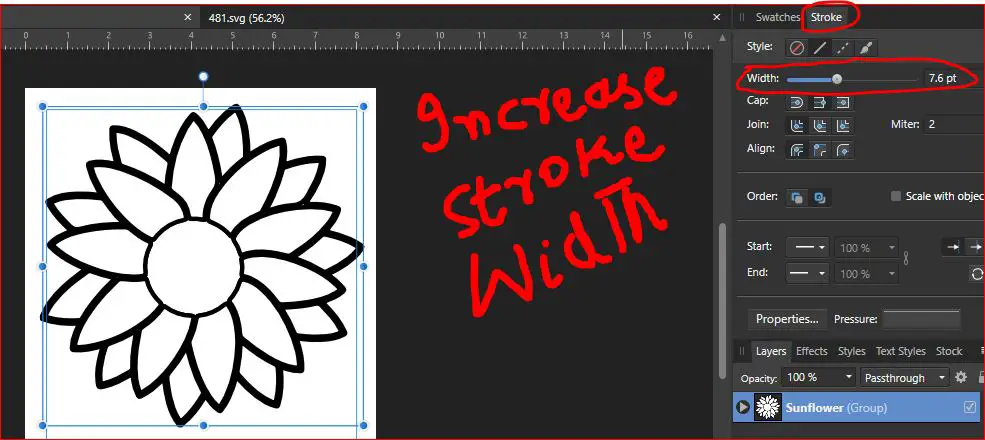
Next, you can adjust the thickness of the stroke to your likings.
Step # 3 – Exporting the Files as Pngs
Once you are satisfied with the look and feel of your coloring page, you can resize it a bit so that it fits inside the margins. Next, you can export it as png, just go to file and hit export…
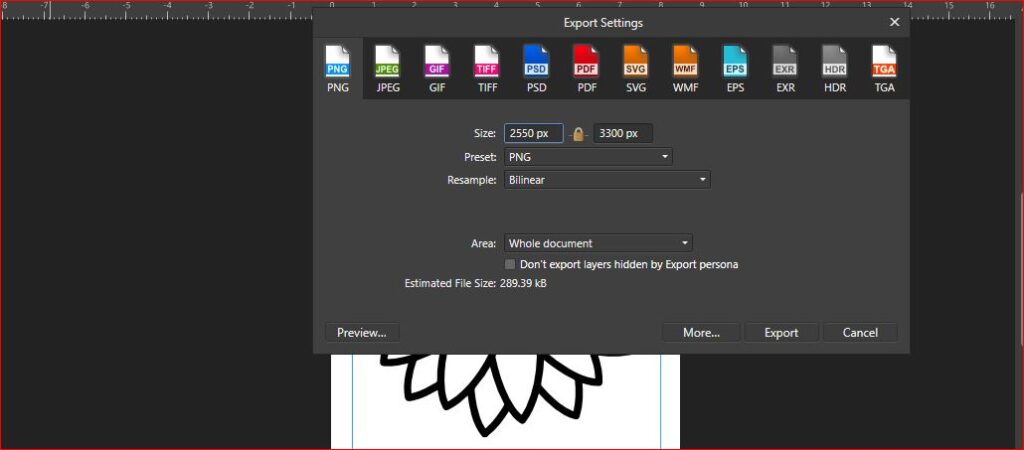
Next, you can repeat these steps for each graphic to create more coloring pages.
# 3 – Creating Print-Ready Coloring Book
In this third and final step, we will import our coloring pages into a PowerPoint document to create a print-ready PDF file.
To this, we need to open a PowerPoint blank document and then resize the slide to create an 8.5 x 11 template. All you need is to click on the design tab>slide size>custom slide size and then set the page with and height as shown below.
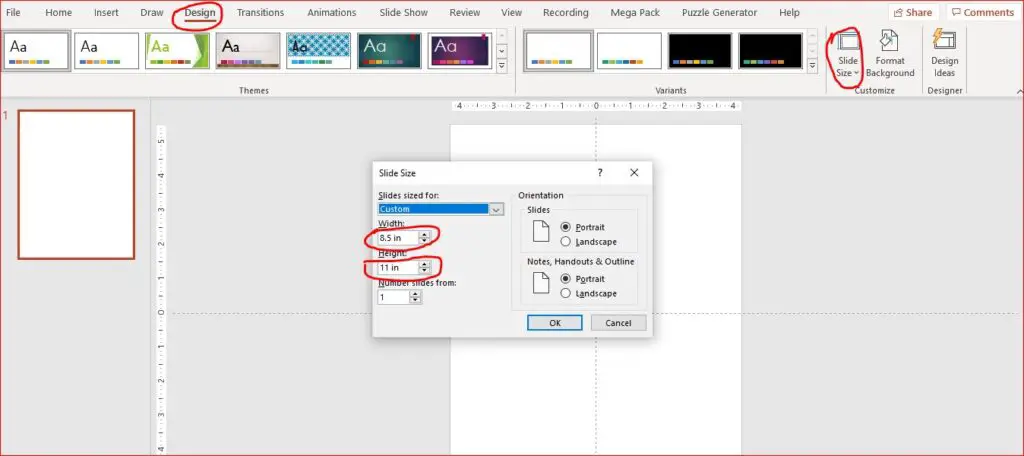
Once you click on OK, you will see a blank document. Now you can drag and drop your coloring page onto this template. To create multiple pages, you can duplicate this slide and then replace the image on 2nd slide. In this way, you can create a 50 or 100-page coloring book.
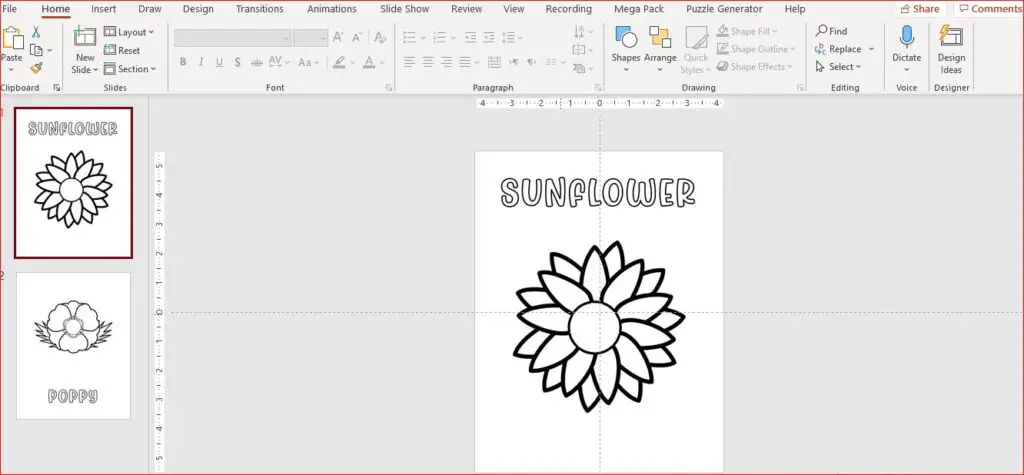
Lastly, you can export this document as a PDF file that you can upload to Amazon kdp as a coloring book interior.
I also have a video on formatting a coloring book in PowerPoint, you may like it…
Let’s Recap Everything!
In this post, I have shared with you my exact process to create a coloring book from scratch. This is a three-step process that involves finding the right kind of graphics and then turning them into coloring pages.
In the last step, we import those coloring pages to any presentation software like PowerPoint to create a print-ready PDF file.
I hope you’ve learned something new from this post. If so, then do share this post with others as well.
Thanks for reading it!
What Next?
❤ Subscribe To My YouTube Channel To Learn More About Low Content Books:
https://www.youtube.com/channel/UCHTJzdE7bzvL8cU0ES6X7mw?sub_confirmation=1
❤ Check out my resource page for tools and resources I personally use to scale my Low Content Publishing Business.
❤ Share this post on your favorite social media site. Thanks!
Subha Malik
Want to Publish Your First Amazon KDP Book the Right Way?
I created a beginner-friendly Amazon KDP course that walks you through niche research, book creation, and publishing — step by step.
👉 Access the Amazon KDP MasterclassPerfect for beginners starting with low- and medium-content books.

